

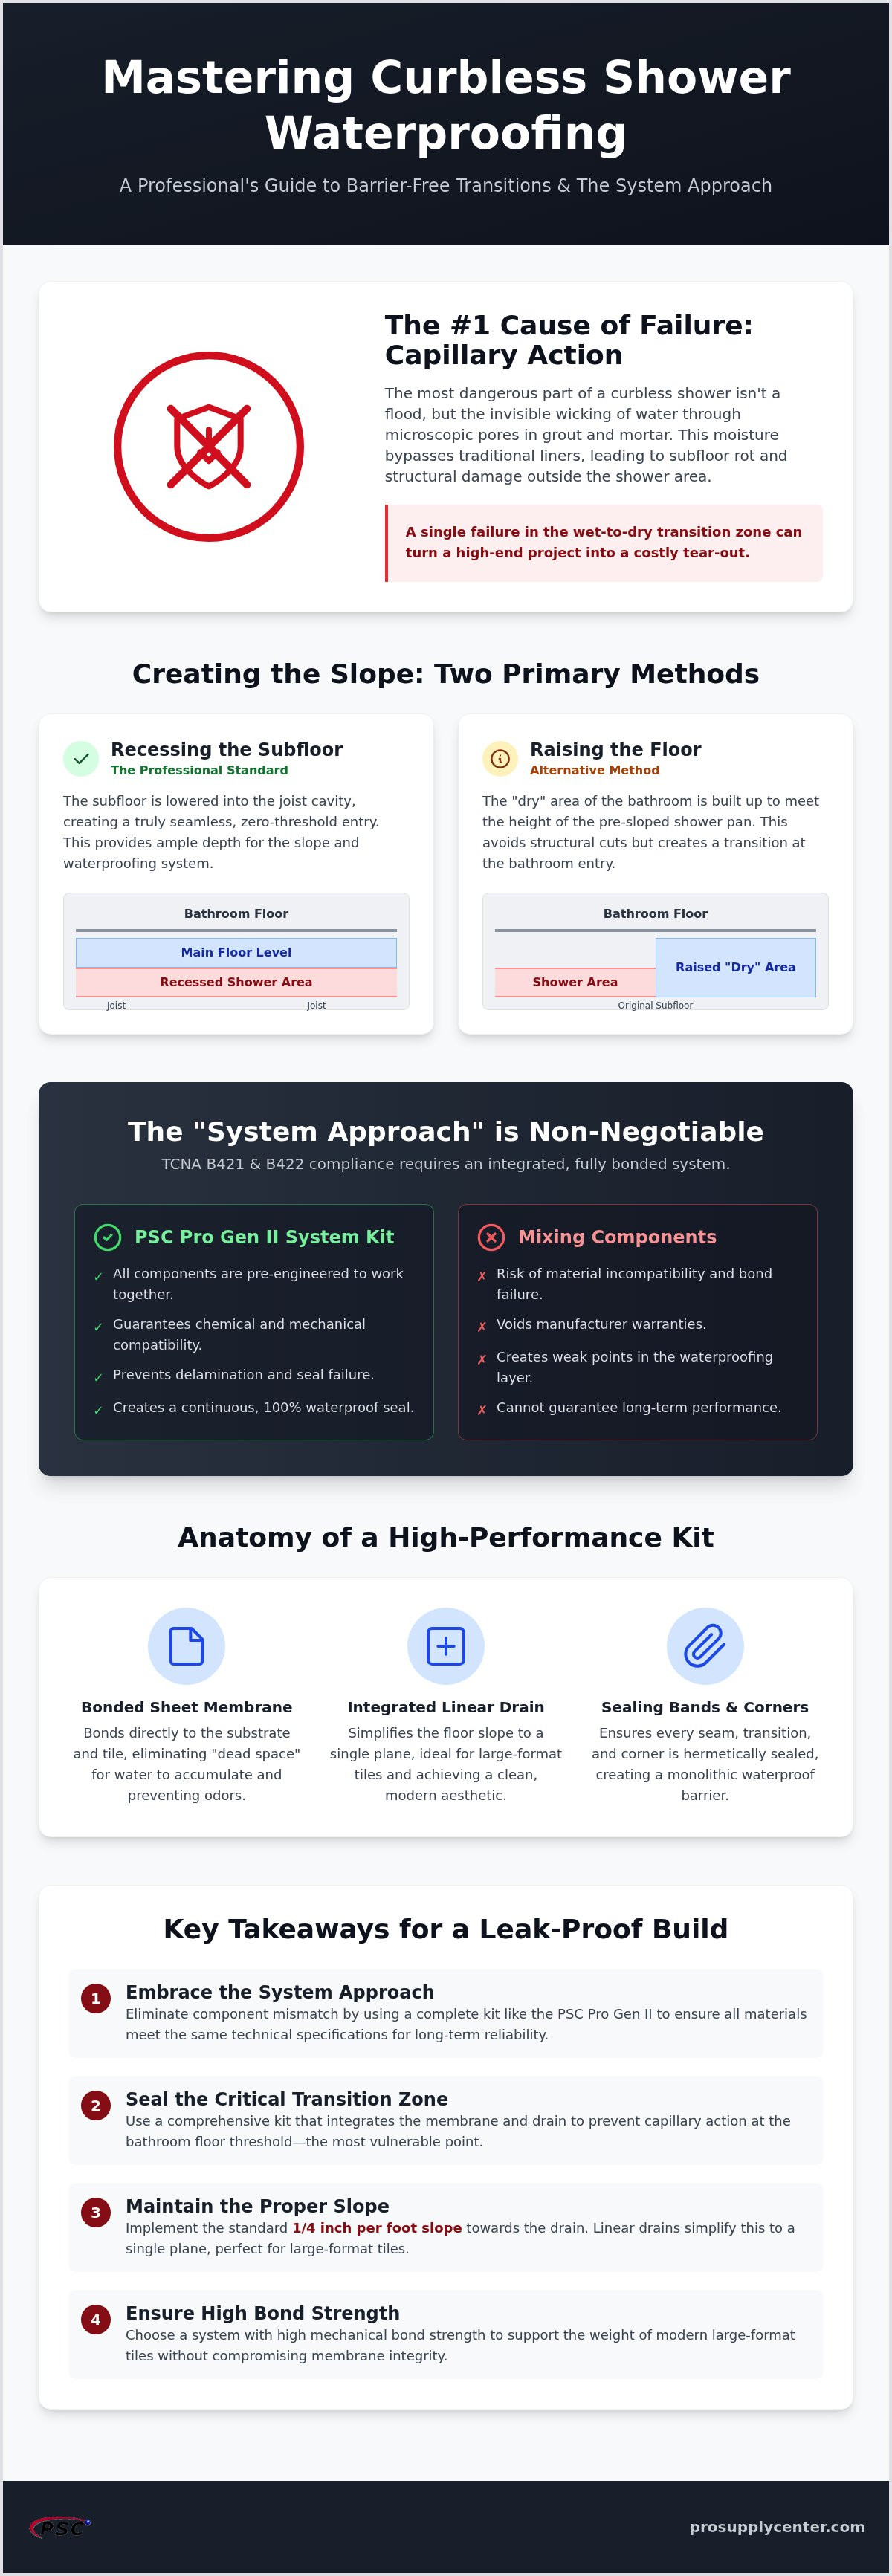
The most dangerous part of a luxury bathroom isn't the slippery tile; it's the invisible physics of capillary action pulling water directly under your bedroom floor. You understand that a curbless design is the gold standard for modern, ADA-compliant accessibility, but the technical execution is notoriously unforgiving. Whether you're debating between recessing the subfloor or raising the entire room, the fear of long-term structural rot is a valid concern for any serious contractor or homeowner. A single failure in the transition zone can turn a high-end project into a costly tear-out.
Mastering these technical requirements is essential for a successful build. This guide provides the professional framework needed to navigate barrier-free transitions using a dedicated curbless shower waterproofing kit to ensure a permanent, leak-proof seal. You'll learn how the PSC Pro Gen II Waterproofing System manages moisture at the critical drain interface and why integrated kits are the only way to achieve TCNA B421 and B422 compliance. We will examine the specific mechanics of bonded membranes and compatible drainage to help you deliver a seamless, structurally sound result every time.
Key Takeaways
- Understand the "System Approach" to waterproofing, which eliminates component mismatch and ensures all materials meet the same technical specifications for long-term reliability.
- Discover how the high mechanical bond strength of the PSC Pro Gen II Waterproofing System supports the weight of modern large-format tiles without compromising the membrane integrity.
- Master the critical transition zone by using a comprehensive curbless shower waterproofing kit that integrates the membrane and drain to prevent capillary action at the bathroom floor threshold.
- Implement the standard 1/4 inch per foot slope requirement and learn how linear drain integration simplifies the drainage layout for barrier-free environments.
- Simplify your selection process by learning how to size your kit based on total bathroom floor area and deciding between sheet membranes or liquid components for complex transitions.
Engineering the Open-Concept Bathroom: The Technical Challenges of Curbless Showers
A curbless shower is more than an aesthetic choice; it's a complex engineering project that transforms the entire bathroom floor into a continuous, integrated system. In a barrier-free design, the traditional 2 inch curb is removed, which eliminates the physical dam that typically contains water within the shower footprint. This design relies on precise floor geometry and the foundational principles of waterproofing to manage both surface runoff and moisture that migrates through the tile assembly. Without a curb, the "wet-to-dry" transition zone becomes the most vulnerable point in the room. Professional standards set by the Tile Council of North America (TCNA), specifically methods B421 and B422, dictate that this transition must be handled with a fully bonded system to prevent structural failure.
The Problem of Capillary Action in Barrier-Free Designs
The most common cause of failure in an open-concept bathroom isn't a visible flood, but the invisible movement of water known as capillary action. This occurs when water is pulled through the microscopic pores of grout and thin-set mortar, wicking moisture away from the shower area and directly into the dry-zone subfloor. Standard PVC pan liners are insufficient for these applications because they cannot be bonded directly to the tile or the surrounding floor. To stop this migration, a curbless shower waterproofing kit must provide a continuous, bonded membrane that extends past the immediate shower area. If the transition isn't hermetically sealed, moisture will eventually reach the baseboards and wall studs outside the shower, leading to mold and subfloor rot that is expensive to remediate.
Subfloor Preparation: Recessing vs. Ramping
Achieving a flush transition requires careful planning of the subfloor height. There are two primary methods used to create the necessary 1/4 inch per foot slope without creating a trip hazard at the door. Recessing the subfloor is the professional standard for a truly seamless look. This involves lowering the subfloor into the joist cavity, which often requires structural modifications to the wood framing or grinding down concrete slabs. It allows the shower floor to sit lower than the main bathroom floor, providing enough depth for the slope and the PSC Pro Gen II Waterproofing System components.
Alternatively, contractors may choose to raise the entire bathroom floor. This method involves building up the "dry" area to meet the height of the sloped shower pan. While this avoids cutting into joists, it creates a vertical offset at the bathroom entrance that must be managed with a transition strip. Regardless of the method, the integrity of the build depends on a stable, deflection-free surface that can support the weight of modern large-format tiles without compromising the waterproof seal.
Anatomy of a High-Performance Curbless Shower Waterproofing Kit
Successful barrier-free installations rely on a "System Approach" rather than a collection of disparate parts. When you mix components from different manufacturers, you risk chemical or mechanical incompatibility that can lead to delamination or seal failure. A professional curbless shower waterproofing kit provides a pre-engineered solution where the membrane, drain, and sealing bands are designed to function as a single unit. This is particularly critical in low-profile builds where there is no margin for error in material thickness. Utilizing the PSC Pro Gen II Waterproofing System allows contractors to maintain a thin profile while ensuring 100% waterproof integrity across the entire bathroom floor.
Bonded Waterproofing Membranes
In curbless applications, a bonded membrane is vastly superior to traditional loose-laid pan liners. Because the membrane is bonded directly to the substrate and the tile is bonded directly to the membrane, there is no "dead space" for water to accumulate. This prevents the "stagnant water" smell often associated with older shower builds. Sheet membranes offer several advantages for professional installers:
- Consistency: Factory-controlled thickness ensures uniform vapor retardance across the floor, meeting strict technical requirements.
- Speed: Unlike liquid-applied liners that require multiple coats and extended curing times, sheet membranes are ready for tile immediately after installation.
- Bond Strength: High-performance fleece webbing provides an aggressive mechanical bond for large-format tiles, which are standard in modern open-concept designs.
Linear Drains and Threshold Seals
Standard center drains require a four-way slope, which is difficult to transition seamlessly into a flat bathroom floor. This is why linear shower drains have become the industry standard for curbless designs. They allow the floor to be pitched in a single plane toward a wall or the entrance. This geometry simplifies the tile layout and directly aligns with ADA Standards for Accessible Design for roll-in showers.
The most critical step in the assembly is flashing the membrane directly into the drain flange to create a hermetic seal. A high-quality curbless shower waterproofing kit includes specialized waterproof bands and pre-formed corners to seal the wall-to-floor transitions. These components prevent moisture from wicking into the wall studs or under the main floor tile. If you want to eliminate the guesswork of component compatibility, it's best to use integrated PSC Waterproofing Shower Kits that have been tested to perform under pressure.
Why the PSC Pro Gen II System Outperforms Traditional Curbless Methods
Professional installers often face a choice between overpriced proprietary brands and generic materials that lack technical backing. The PSC Pro Gen II system offers a pragmatic middle ground, delivering high-performance results without the unnecessary proprietary markup. This system prioritizes mechanical bond strength through its specialized fleece webbing. Unlike traditional liquid membranes that can vary in thickness based on the installer's brush stroke, this sheet-based curbless shower waterproofing kit provides a consistent, factory-verified barrier. Adhering to TCNA curbless shower installation standards requires a level of reliability that only an integrated system can provide.
Efficiency on the job site is another area where this system excels. By utilizing PSC Waterproofing Shower Kits, contractors can bypass the time-consuming process of sourcing individual, compatible components. This reduces the risk of component mismatch and ensures that every part of the assembly, from the drain flange to the corner seals, meets the same rigorous performance specs. It's a no-nonsense approach to complex bathroom engineering that values functional reliability over marketing flair.
Lippage Prevention and Tile Alignment
The success of a barrier-free transition is measured by the flatness of the floor. In a curbless environment, even minor tile lippage can compromise safety and accessibility. The low-profile design of the Gen II system is specifically engineered to minimize build-up at the seams. When paired with a ceramic tile leveling system, installers can achieve a perfectly flush transition from the shower area to the main bathroom floor. This is a non-negotiable requirement for ADA-compliant wheelchair access, where a smooth, stable surface is essential for mobility and safety.
Durability and Puncture Resistance
A waterproofing membrane is only effective if it remains intact during the installation process. Job sites are harsh environments where dropped tools or heavy foot traffic can easily puncture lower-grade liners. The PSC membrane is engineered with high puncture resistance to withstand these real-world conditions. This durability doesn't come at the expense of flexibility; the membrane remains easy to fold into corners and flash into drains. This balance of strength and workability ensures the long-term structural integrity of the bathroom, protecting the subfloor from rot even under heavy rolling loads or constant daily use.
Critical Installation Zones: Transition Points and Linear Drain Integration
The threshold is the most vulnerable point in any barrier-free design. Without a physical curb, you're relying entirely on floor geometry and the integrity of your curbless shower waterproofing kit to keep water where it belongs. A standard requirement for proper drainage is a slope of 1/4 inch per foot toward the drain. This pitch must be consistent and transition smoothly into the flat bathroom floor. Using a high-quality walk-in shower waterproofing kit ensures that the membrane extends far enough into the "dry" area to create a truly continuous system. Beyond the floor, you must also seal every penetration in the wet area, including mixing valves, shower heads, and integrated niches, to prevent moisture from bypassing the membrane.
The Capillary Break: Preventing Moisture Migration
A common oversight in curbless builds is failing to install a physical capillary break. Even with a sloped floor, water can travel through the mortar bed and grout lines via wicking. To stop this migration, you should install a non-porous strip at the shower entrance. This break acts as a dam beneath the tile surface. It's best practice to seal this break using PSC-compatible hybrid sealants. This creates a permanent barrier that prevents moisture from reaching the subfloor of the main bathroom, protecting against long-term structural rot. Don't skip this step; a lack of a capillary break is a frequent cause of warranty claims in open-concept bathrooms.
Linear Drain Placement: Wall vs. Entrance
Choosing where to place the shower floor drain significantly impacts your waterproofing strategy. Placing the drain at the back wall is often preferred because it allows the entire floor to slope in one direction, away from the entrance. This simplifies the tile work and keeps the entrance perfectly level. However, placing the drain at the entrance can act as a secondary catch for runoff in smaller rooms. Regardless of location, the channel for the linear drain must be meticulously waterproofed. Your curbless shower waterproofing kit should include flashing that integrates directly with the drain flange. This eliminates the weak spot where the floor meets the drainage hardware. If you're ready to secure your next project with a reliable system, shop professional-grade curbless kits today to ensure a leak-proof finish.
Selecting Your PSC Waterproofing Shower Kit for Barrier-Free Success
Moving from the design phase to procurement requires a precise calculation of your project's footprint. A common mistake is sizing a kit based solely on the shower pan dimensions. In a barrier-free environment, the "wet zone" often extends 2 to 3 feet beyond the immediate shower area to account for overspray and wicking. You must select a curbless shower waterproofing kit that provides enough membrane to cover the entire sloped section and the critical transition zone. Utilizing the PSC Pro Gen II Waterproofing System ensures you have a bonded, continuous barrier that protects the structural integrity of the entire bathroom floor. Choosing a complete kit also secures a system-wide warranty, which is essential for professional accountability on both residential and commercial jobs.
Customizing Kits for Commercial ADA Compliance
Commercial environments like healthcare facilities or gyms demand a system that can withstand constant moisture and heavy rolling loads. When you're scaling for multi-stall configurations, the load-bearing capacity of the membrane is a primary concern. It must support the weight of wheelchairs and heavy equipment without deforming or compromising the waterproof seal. For these high-use areas, it's vital to supplement your kit with additional pre-formed outside corners and pipe seals. These components eliminate the need for complex "butterfly" cuts in the field, reducing the risk of installation errors in the most vulnerable corners of the room.
Final Checklist and Job Site Prep
Before installing the membrane, the substrate must be meticulously prepared. The surface should be clean, level, and free of any debris that could interfere with the mechanical bond. Utilizing professional grade abrasives for tile or concrete is the most effective way to ensure the transition zone is ready for optimal adhesion. Once the curbless shower waterproofing kit is installed, flood testing remains a non-negotiable requirement. Filling the sloped area for 24 hours verifies that the drain integration and threshold seals are hermetic. This step provides the necessary proof of performance before you proceed with the final tile installation. Your final step is to verify the floor recess depth one last time to ensure a perfectly flush, trip-free entrance.
Securing the Future of Barrier-Free Design
Designing a high-performance open-concept bathroom requires a shift toward a fully integrated system approach. You now understand that a successful build isn't just about aesthetics; it's about managing water migration at the threshold. By utilizing a comprehensive curbless shower waterproofing kit, you eliminate the risks of component mismatch and ensure every layer meets rigorous technical standards. From the mechanical bond of the fleece webbing to the precision of linear drain integration, these details determine the structural integrity of your project.
The PSC Pro Gen II Waterproofing System is engineered for seamless, leak-proof transitions. It provides the complete system compatibility required for professional-grade, ADA-compliant results that stand up to daily use. Whether you're managing a residential renovation or a commercial installation, having the right materials is the first step toward a failure-free outcome. Shop PSC Pro Gen II Curbless Shower Waterproofing Kits to equip your next project with the reliability it deserves. You have the technical framework; now it's time to build with confidence.
Frequently Asked Questions
Do I need a special kit for a curbless shower vs. a standard shower?
Yes, you typically need a specialized curbless shower waterproofing kit that includes extra membrane to cover the transition zone. Standard kits often only provide enough material for the shower pan itself. In a barrier-free setup, the waterproofing must extend well into the dry area of the bathroom to prevent moisture wicking. A dedicated kit ensures you have the correct linear drain compatibility and sufficient sealing bands to secure the flush entry point against leaks.
Is a curbless shower more likely to leak than a traditional one?
A curbless shower isn't inherently more likely to leak, but it's more sensitive to installation errors. Without a physical curb to contain water, the system relies entirely on the pitch of the floor and the integrity of the bonded membrane. Failures usually occur at the threshold due to poor sealing or insufficient slope. Using the PSC Pro Gen II Waterproofing System minimizes these risks by creating a hermetic, continuous seal across the entire floor area.
What is the minimum slope required for a curbless shower floor?
The industry standard for shower drainage is a minimum slope of 1/4 inch per foot toward the drain. In a curbless environment, maintaining this pitch is critical to ensure water doesn't pool at the entrance or run out into the main bathroom area. Achieving this slope often requires recessing the subfloor or raising the surrounding floor area. Precise geometry is your primary defense against surface runoff and is essential for any barrier-free configuration.
Do I have to recess the floor joists for a curbless installation?
Recessing the subfloor into the joist cavity is the most effective way to create a flush transition without a vertical offset. However, you can also raise the entire bathroom floor to match the height of the sloped shower area. The choice depends on your structural constraints and the existing floor height. On wood subfloors, recessing usually involves adding sister joists or using specialized structural brackets to lower the floor height safely.
Can I use a square drain in a curbless shower?
You can use a square drain, but it's technically more difficult than using a linear drain. A square drain requires a four-way slope, which creates "valley" cuts in the tile that are hard to transition into a flat bathroom floor. Linear drains allow for a single-plane slope, which is much easier to align with large-format tiles. Most professionals prefer linear options for curbless projects to simplify the geometry and improve the overall aesthetic flow.
What is a capillary break, and why is it needed for barrier-free showers?
A capillary break is a physical barrier installed at the shower entrance to stop water from traveling through the mortar and grout. Even with a sloped floor, moisture can wick horizontally under the tile via capillary action. By installing a non-porous strip and sealing it with a hybrid sealant, you create a "stop" for this moisture. This prevents the bathroom floor outside the shower from becoming saturated and eventually rotting the structural subfloor.
Is the PSC Pro Gen II system compatible with large-format porcelain tile?
The PSC Pro Gen II Waterproofing System is specifically engineered to handle the weight and bond requirements of large-format porcelain tiles. Its specialized fleece webbing creates an aggressive mechanical bond with thin-set mortar. This is essential for modern curbless designs where large tiles are used to create a seamless look. The system's flat profile also helps prevent lippage; this ensures the floor remains safe and ADA-compliant for wheelchair access without uneven edges.
Can I install a curbless shower on a wooden subfloor?
You can install a curbless shower on a wooden subfloor if it meets the deflection standards for tile, typically L/360. The subfloor must be rigid enough to prevent movement that could crack the grout or compromise the membrane. Using a curbless shower waterproofing kit on a wood substrate requires careful attention to the transition zone. Ensuring the subfloor is clean and properly supported will prevent long-term structural issues and ensure the system remains leak-proof over time.


