

Is your shower niche a functional storage solution or a ticking time bomb for water damage? While a recessed shelf is a staple of modern bathroom design, it's also the most critical waterproofing junction in the entire enclosure. Choosing high quality integrated shower niches is the most effective way to ensure the transition between the wall membrane and the storage shelf remains completely watertight over time. Most professionals agree that the struggle to get tile to line up perfectly within a custom-framed box often leads to frustrating labor hours and unsightly lippage.
This guide will show you how to select and install components that guarantee a 100% leak-proof result and a professional aesthetic. You'll learn why prefabricated options outperform site-built boxes, how to navigate material choices like foam or ceramic, and the exact steps to integrate these units into the PSC Pro Gen II Waterproofing System. We will cover everything from precise sizing to final tile placement, ensuring your next project is both durable and efficient without the risk of hidden moisture damage behind the wall.
Key Takeaways
- Understand why factory-engineered inserts eliminate the common failure points found in site-built framing and manual waterproofing.
- Compare the performance of HIPS, high-density foam, and ceramic materials to ensure your storage solution is completely non-porous.
- Save on labor hours and reduce job site complexity by choosing prefabricated integrated shower niches that don't require manual membrane application.
- Apply precise framing and cutting techniques to achieve a flush fit, which is essential for a professional finish with minimal lippage.
- See why it's more efficient to use a complete PSC Pro Gen II Waterproofing System to ensure every component works together for a leak-proof result.
What is an Integrated Shower Niche?
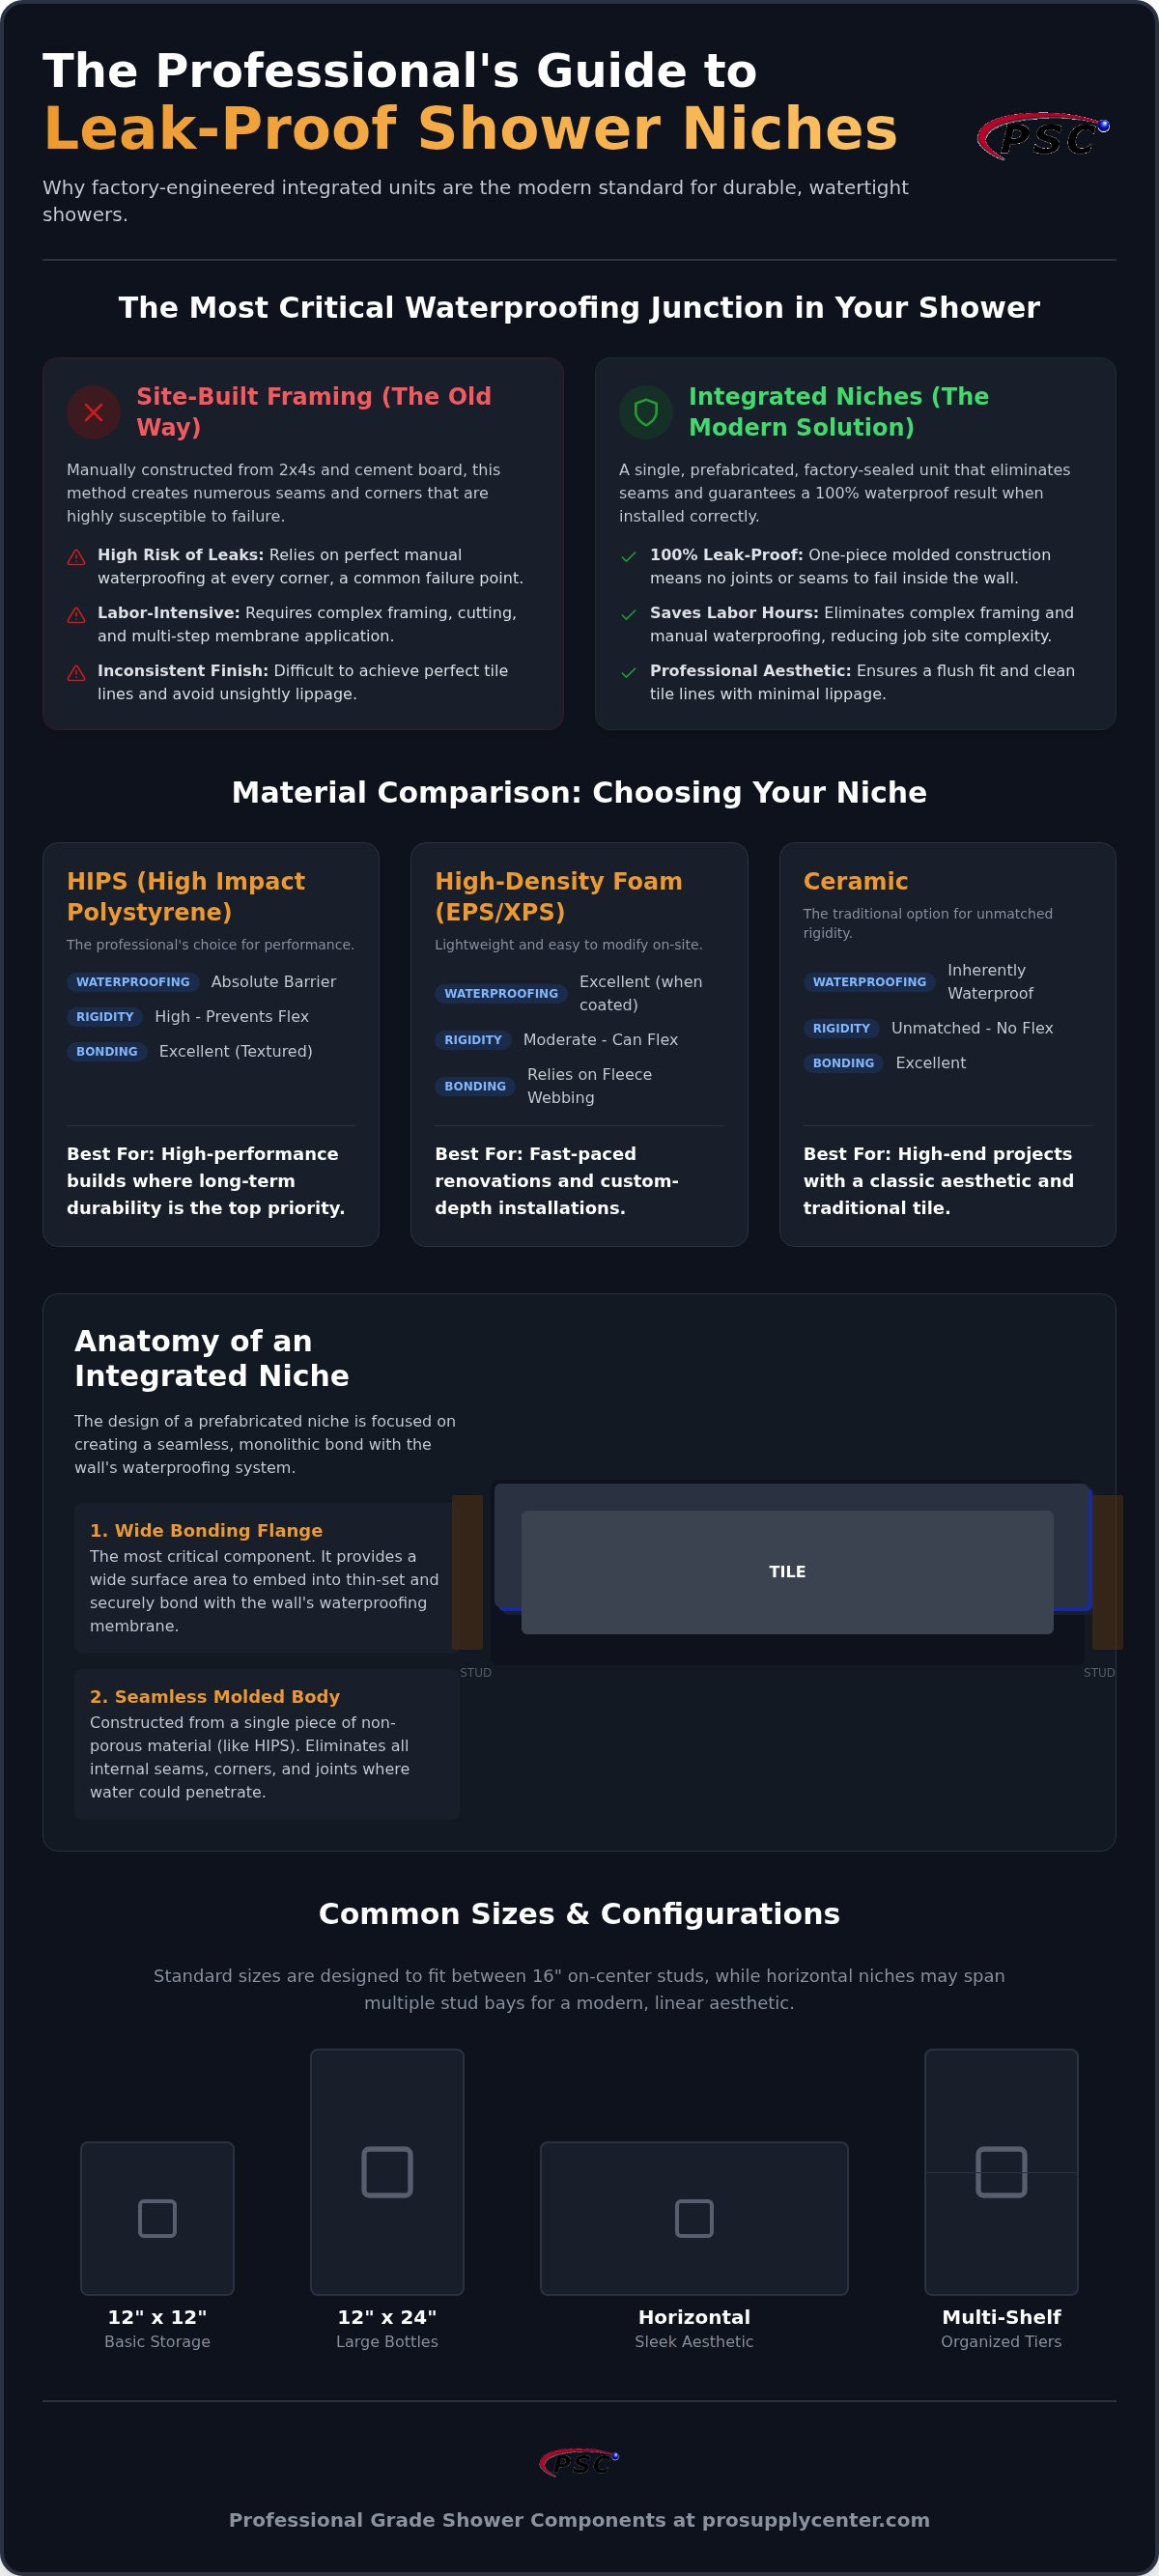
An integrated shower niche is a prefabricated, recessed storage unit engineered to fit between wall studs. Traditionally, contractors built "cubbies" using 2x4 framing, cement board, and manual waterproofing applications. This old method is prone to failure because it relies on perfect corner seals in a high-moisture zone. Modern integrated shower niches solve this by providing a factory-sealed unit that eliminates the need for complex site-built framing. It's the primary solution for preventing moisture intrusion in recessed wall cavities.
The term "integrated" in integrated shower niches refers to more than just the physical placement within the wall. It describes how the unit bonds with the surrounding waterproofing membrane. Unlike a surface-mounted shelf or a traditional Bathroom cabinet, these units are designed to become a monolithic part of the wall's barrier system. This evolution from manual construction to factory engineering reduces labor hours and provides a consistent, leak-proof result.
Key Components of an Integrated System
The niche flange is the most critical part of the assembly. It provides the surface area needed for a secure bond between the niche and the wall's waterproofing layer. High-quality flanges are wide enough to accommodate waterproofing tape or liquid membranes without creating a thick buildup that causes tile lippage. The box body itself is typically constructed from High Impact Polystyrene (HIPS), high-density foam, or ceramic. HIPS is favored for its non-porous nature and rigid structure. For the highest level of protection, these units are designed for full compatibility with the PSC Pro Gen II Waterproofing System, ensuring the entire shower remains watertight.
Common Sizes and Configurations
Standard vertical formats like 12"x12" and 12"x24" remain the most popular choices because they fit easily between standard 16" on-center studs. A 12"x12" unit is ideal for basic storage, while the taller 12"x24" format offers room for larger bottles. Modern designs frequently utilize horizontal landscape niches, which span across multiple stud bays to create a wide, sleek aesthetic. If you have high-volume storage needs, multi-shelf units provide organized tiers without requiring multiple separate installations. Choosing the right configuration depends on both your storage requirements and the structural layout of your framing.
Comparing Niche Materials: HIPS, Foam, and Ceramic
Material choice determines the longevity of any shower installation. While the International Plumbing Code (IPC) mandates specific waterproofing standards for bathroom fixtures, the physical substrate of integrated shower niches dictates how well tile will adhere and resist moisture over decades of use. HIPS (High Impact Polystyrene) is a standout for high-performance builds. It's a non-porous, solid thermoplastic that provides an absolute barrier against water. Unlike site-built cubbies, HIPS doesn't have seams that can split or rot, making it a reliable choice for professional contractors.
High-density foam niches, usually made from EPS or XPS, offer a lightweight alternative that's easy to trim on-site. These units are often favored for fast-paced renovations because they can be adjusted to fit specific stud depths with a simple utility knife. However, they require a fleece-webbing overlay to ensure the thin-set mortar can achieve a mechanical bond. Without this webbing, mortar won't stick to the bare foam. While foam is efficient, it must be high-density to prevent flexing. If a niche bows under the weight of tile or pressure from a user, the grout lines will eventually crack and allow moisture to bypass the tile layer.
Traditional ceramic options remain a staple for many high-end projects. Ceramic soap dishes and recessed niches provide unmatched structural rigidity. They don't flex, they don't rot, and they offer a classic aesthetic that integrates seamlessly with traditional tile layouts. The primary trade-off is often a more limited range of sizes compared to modern synthetic options. For those looking for the most reliable materials, exploring professional-grade shower niches is the best starting point for a high-performance installation.
Bonding Capabilities and Adhesive Compatibility
Thin-set mortar relies on either a chemical or mechanical bond to stay in place. Ceramic and HIPS units often feature textured surfaces to enhance chemical adhesion. Foam units rely almost exclusively on mechanical bonding through the aforementioned fleece webbing. This webbing creates a "tooth" for the mortar to grab. It's vital to use unmodified or modified thin-set as specified by the niche manufacturer to avoid compatibility issues. Using the wrong adhesive can lead to delamination in wet environments, causing the tile to pull away from the niche body.
Durability and Mold Resistance
Modern builds demand non-organic materials. Site-built niches often fail because they incorporate wood framing or paper-faced products that invite mold growth once a leak occurs. Prefabricated integrated shower niches remove these organic risks entirely. Additionally, these units eliminate the "hollow sound" common in poorly supported custom cubbies. A properly installed, rigid niche feels like a solid part of the wall. This structural integrity is essential for a professional finish and long-term performance in a daily-use shower environment.
Prefabricated Niches vs. Site-Built Framing
Choosing between a custom-framed box and integrated shower niches often comes down to a trade-off between perceived material savings and actual labor costs. While using scrap lumber and backer board remnants seems cost-effective, the hidden hours spent on framing, blocking, and detailed waterproofing tell a different story. A site-built niche requires precise carpentry followed by a meticulous waterproofing process that is high-risk. In contrast, a prefabricated unit arrives factory-sealed and perfectly square, ensuring that the tile layout starts on a stable, predictable surface.
Failure in a shower almost always occurs at the seams and corners. For a custom niche, you have twelve internal 90-degree corners that must be perfectly sealed. Achieving a leak-proof shower niche installation with manual membrane application is difficult and leaves no room for error. If the bond fails at just one corner due to structural movement or improper thin-set coverage, moisture will penetrate the wall cavity. Manufacturers of waterproofing systems typically prefer prefab inserts because they eliminate these variables, offering a more robust system warranty for the entire build.
The Problem with Site-Built Niches
The primary issue with manual construction is the complexity of the waterproofing detail. Applying liquid liners or sheet membranes into tight internal corners often results in either a build-up of material that prevents tile from sitting flush or a thin spot that's prone to leaking. Structural movement is also a factor; as a house settles, custom-framed niches are more likely to experience stress at the joints. Additionally, without a factory-molded pitch, the bottom sill of a site-built niche is frequently installed flat. This leads to water pooling and eventual grout deterioration, which wouldn't happen with the pre-sloped floors of integrated shower niches.
Efficiency Gains for Professional Contractors
For the professional contractor, the most compelling argument for prefab units is the massive reduction in labor. What used to be a four-hour task involving framing, blocking, and multi-stage waterproofing is reduced to a fifteen-minute installation. This speed is especially valuable in commercial or multi-family projects where consistency across dozens of units is required. By using these units alongside complete waterproofing shower kits, installers can achieve a faster project turnaround without sacrificing the integrity of the build. It's a pragmatic choice that prioritizes job site efficiency and long-term reliability over the false economy of site-built alternatives.
Installation Best Practices for a Leak-Proof Seal
Success starts with the structural skeleton. For integrated shower niches, the framing must be rigid and perfectly plumb to prevent the unit from twisting during installation. Most standard units are designed to fit between 16-inch on-center studs. If you're installing a wider landscape format, you must frame a header and sill to support the structural load of the wall. Once the framing is set, install horizontal blocking at the top and bottom of the opening. This gives you a solid surface to screw the niche flange into, ensuring it stays flush with the backer board substrate.
Sealing the flange is the most critical waterproofing step. This junction is where the wall membrane meets the niche body. Apply a layer of thin-set mortar or a high-quality sealant over the flange. Then, embed your waterproofing band, maintaining at least a 2-inch overlap onto the surrounding wall. This overlap creates a continuous, monolithic barrier that stops water from wicking behind the tile layer. When you're working with larger tiles, using a tile leveling system for large format tile is essential. It prevents the tile edges from kicking out at the niche corners, which is a common area for unsightly lippage.
Sealing the Perimeter
When you're sealing the perimeter, choosing between waterproofing bands and liquid sealants depends on your overall system. Bands are generally better because they provide a consistent thickness that won't interfere with your tile layout. If your niche doesn't come with a factory-bonded fleece, you should use pre-formed inside corner seals to reinforce the 90-degree junctions. To get the best results, you can shop professional waterproofing components that are specifically engineered for these types of transitions. Always verify the slope before you thin-set your tile. Even with a pre-pitched unit, a quick check with a level ensures that water will actually run off the shelf and into the shower pan.
Layout and Aesthetic Planning
The visual impact of a niche depends on its alignment with the tile grid. Follow these professional guidelines for a polished result:
- The Eye-Level Rule: Place the niche between 48 and 60 inches from the floor. This makes it accessible for most users while keeping it in a prominent visual position.
- Grout Line Alignment: Map out your tile grid before cutting the backer board. You want the top and bottom of the niche to align with full tile courses to avoid thin sliver cuts.
- Edge Protection: Plan for metal trim profiles or bullnose tiles early. Metal edge profiles provide a clean, modern finish and protect the raw edges of the tile from chipping over time.
By coordinating the niche location with your tile map, you simplify the cutting process and ensure the focal point of your shower looks intentional rather than like an afterthought.
Optimizing Your Shower with PSC Pro Integrated Components
Achieving a professional finish requires more than just high-quality tiles; it requires a system where every component is engineered to work together. The PSC Pro Gen II Waterproofing System provides this synergy by treating the shower enclosure as a single, monolithic unit. When you install integrated shower niches within this system, you aren't just adding a shelf. You're completing a high-performance barrier designed for professional-grade leak protection that stands up to daily use without the risk of hidden moisture damage.
One of the most efficient ways to manage a project is by utilizing a complete PSC Waterproofing Shower Kit. These kits include the wall membrane, floor pan, and integrated components needed for a successful build. By sourcing everything in a single kit, you eliminate the risk of material incompatibility that often occurs when mixing different brands. This streamlined approach allows contractors to move from framing to tiling with fewer interruptions, which significantly reduces total labor hours and simplifies the management of the job site.
The PSC Pro Gen II Advantage
The versatility of the system is evident in its compatibility with various materials, including HIPS, high-density foam, and ceramic units. Whether you're using a standard prefabricated unit or specialized ceramic niches, the bonding mortars and waterproofing bands are designed for maximum adhesion. The PSC Pro Gen II Waterproofing System ensures a vapor-tight seal at the niche-to-wall transition by utilizing high-performance membranes that bridge the gap between the wall substrate and the niche flange. This prevents moisture from bypassing the primary barrier, even in high-steam environments. This workflow optimization ensures that the most vulnerable part of the wall remains as durable as the rest of the enclosure.
Selecting the Right Accessories
A cohesive shower design often involves combining multiple storage elements to meet the user's needs. You can pair integrated shower niches with matching ceramic soap dishes to create organized zones for different toiletries while maintaining a consistent aesthetic. Beyond storage, consider how your shower drain profile complements the niche placement. Choosing a drain that matches the finish and style of your niche trim provides a polished, professional look. For contractors tackling complex layouts or large-scale commercial installs, consulting our technical guides provides the specific data needed for high-volume success.
Before the first tile is set, perform a final inspection of the niche seal. Check that the waterproofing band is fully embedded in the thin-set and that there are no openings or air bubbles at the edges. Verifying the integrity of the niche-to-wall bond at this stage is the only way to guarantee a leak-proof result for the life of the shower. Once the seal is confirmed, you can proceed with the tile layout, confident that the underlying structure is secure and ready for a high-quality finish.
Build for Longevity with Professional Waterproofing
Transitioning from site-built framing to engineered solutions is the most logical step for any serious installer. By choosing integrated shower niches, you eliminate the twelve most common failure points in a shower enclosure. These factory-sealed units don't just save hours on framing and blocking; they provide a square, sloped, and non-porous substrate that ensures your tile finish remains professional and free of lippage. You can focus on the aesthetic details of the tile layout while the underlying structure handles the heavy lifting of moisture management.
Successful builds rely on the synergy between materials. When these components are paired with a comprehensive system like the PSC Pro Gen II, the result is a monolithic barrier that is truly leak-proof for life. This systematic approach reduces job site complexity and provides the structural rigidity required for high-end tile installations. Explore Professional Integrated Shower Niches at Pro Supply Center to access a curated selection of contractor-grade components. Our inventory is specifically designed for compatibility with the industry-leading PSC Pro Gen II Waterproofing System. Start your next renovation with the confidence that comes from using materials engineered to perform under pressure.
Frequently Asked Questions
Do I need to waterproof a prefab shower niche before tiling?
The niche body itself is waterproof, but you must seal the perimeter flange. Use waterproofing bands and thin-set mortar to bridge the gap between the niche and the wall membrane. This ensures a continuous barrier. Most high-quality units are made from non-porous HIPS or foam, so the internal surfaces don't require additional liquid membrane unless specified by the manufacturer for specific bonding needs or local code compliance.
Can I install an integrated shower niche horizontally?
Yes, but you must modify the wall framing to support the wider span. Standard vertical niches fit between 16-inch on-center studs, but a horizontal landscape niche requires cutting studs and installing a structural header and sill. This process is similar to framing a window opening. Always ensure the niche is designed for horizontal orientation so the pre-sloped floor still drains water correctly toward the shower pan.
What is the best height for a shower niche installation?
The industry standard is to place the niche at eye level, typically between 48 and 60 inches from the shower floor. This range keeps toiletries accessible for most adults without requiring excessive reaching or bending. For a professional finish, adjust the exact height to align with your tile's horizontal grout lines. This prevents awkward sliver cuts and ensures the niche looks like a planned part of the bathroom design.
Will an integrated niche fit in a standard 2x4 stud wall?
Most prefabricated units are specifically designed for 2x4 framing, which provides a 3.5-inch cavity depth. Standard niches usually have a depth of 3.5 to 4 inches, allowing them to sit flush with the backer board and tile. If your wall uses 2x6 studs, you'll have extra space behind the unit. Conversely, if you have a thin plumbing wall or furred-out space, check the product specifications for shallow-depth models before starting.
How do I prevent water from pooling on the bottom of the niche?
Ensure the bottom shelf has a slight positive pitch of about 1/8 inch toward the shower interior. Many integrated shower niches are manufactured with a built-in slope to facilitate drainage. If your unit is flat, you must create this pitch manually using thin-set mortar when setting the bottom tile. Proper drainage prevents soap scum buildup and protects the grout lines from prolonged water exposure, which can lead to eventual deterioration.
Can I add a niche to an existing tiled shower?
Retrofitting a niche into a finished shower is difficult because it compromises the existing waterproofing membrane. To do it correctly, you must remove enough tile to expose the studs and properly integrate a new membrane with the old one. This often leads to leaks if the transition isn't perfect. It's generally better to use a surface-mounted shelf unless you're planning a full tear-out and renovation of the shower enclosure.
What is the difference between a tile-ready niche and a finished ceramic niche?
A tile-ready niche is a substrate that requires you to install tile on its interior surfaces. This allows for a custom look that matches your walls. A finished ceramic niche or soap dish is a pre-glazed unit that doesn't require additional tiling. Ceramic units offer a traditional aesthetic and high rigidity, while tile-ready integrated shower niches provide more flexibility for modern, seamless designs that use large format tiles or mosaic accents.
Do integrated niches work with both liquid and sheet waterproofing membranes?
Yes, high-quality niches are compatible with both liquid-applied and sheet-bonded waterproofing systems. When using liquid membranes, apply the product over the flange and onto the surrounding backer board according to the manufacturer's overlap requirements. For sheet membranes like the PSC Pro Gen II, embed waterproofing bands into thin-set mortar over the flange. This versatility allows contractors to use their preferred waterproofing method while maintaining a reliable, leak-proof seal at the wall transition.


