

Will a six-inch base protect the wall where it matters, or look oversized once it’s installed? Choosing 6 inch vinyl cove base involves more than picking a taller trim. Room use, wall condition, profile, and installation method all affect whether it’s a practical fit.
It’s easy to focus on height and overlook details that can complicate ordering, such as flexibility around corners and how the trim attaches to the substrate. Planning these details in advance helps reduce gaps, adhesion problems, and excess material.
This guide explains how to assess six-inch coverage, compare profiles and finishes, and check surface and installation requirements before you buy. You’ll also learn how to measure wall runs, plan for corners, and estimate materials. Pro Supply Center carries vinyl and rubber cove base trims, and these selection steps can help you narrow down the right option for your project.
Key Takeaways
- Assess whether six-inch coverage suits the wall conditions and the room’s intended look before choosing a trim height.
- Compare profile, material, finish, and installation format, then match product details to project requirements.
- Six-inch height isn’t automatically too tall. Balance broader wall coverage against a more prominent visual band.
- Map wall runs, measure lengths, account for openings, and plan corners before calculating the order quantity.
- For 6 inch vinyl cove base, match the adhesive and installation method to the product instructions and substrate.
When Does 6 Inch Vinyl Cove Base Make Sense for a Project?
Six-inch vinyl cove base is resilient trim installed where the wall meets the floor. Like other baseboards, it covers the joint and can help protect the lower wall while creating a finished transition. The general purpose of Baseboard applies, but the added height changes how much wall the trim covers and how strongly it stands out in the room.
The nominal six-inch dimension is a starting point, not a guaranteed installed coverage measurement. Profiles and actual product dimensions can differ, so review the product details before planning the layout or setting expectations for the finish. For broader context on selecting material and performance characteristics, see the commercial grade cove base guide.
What does six-inch cove base cover?
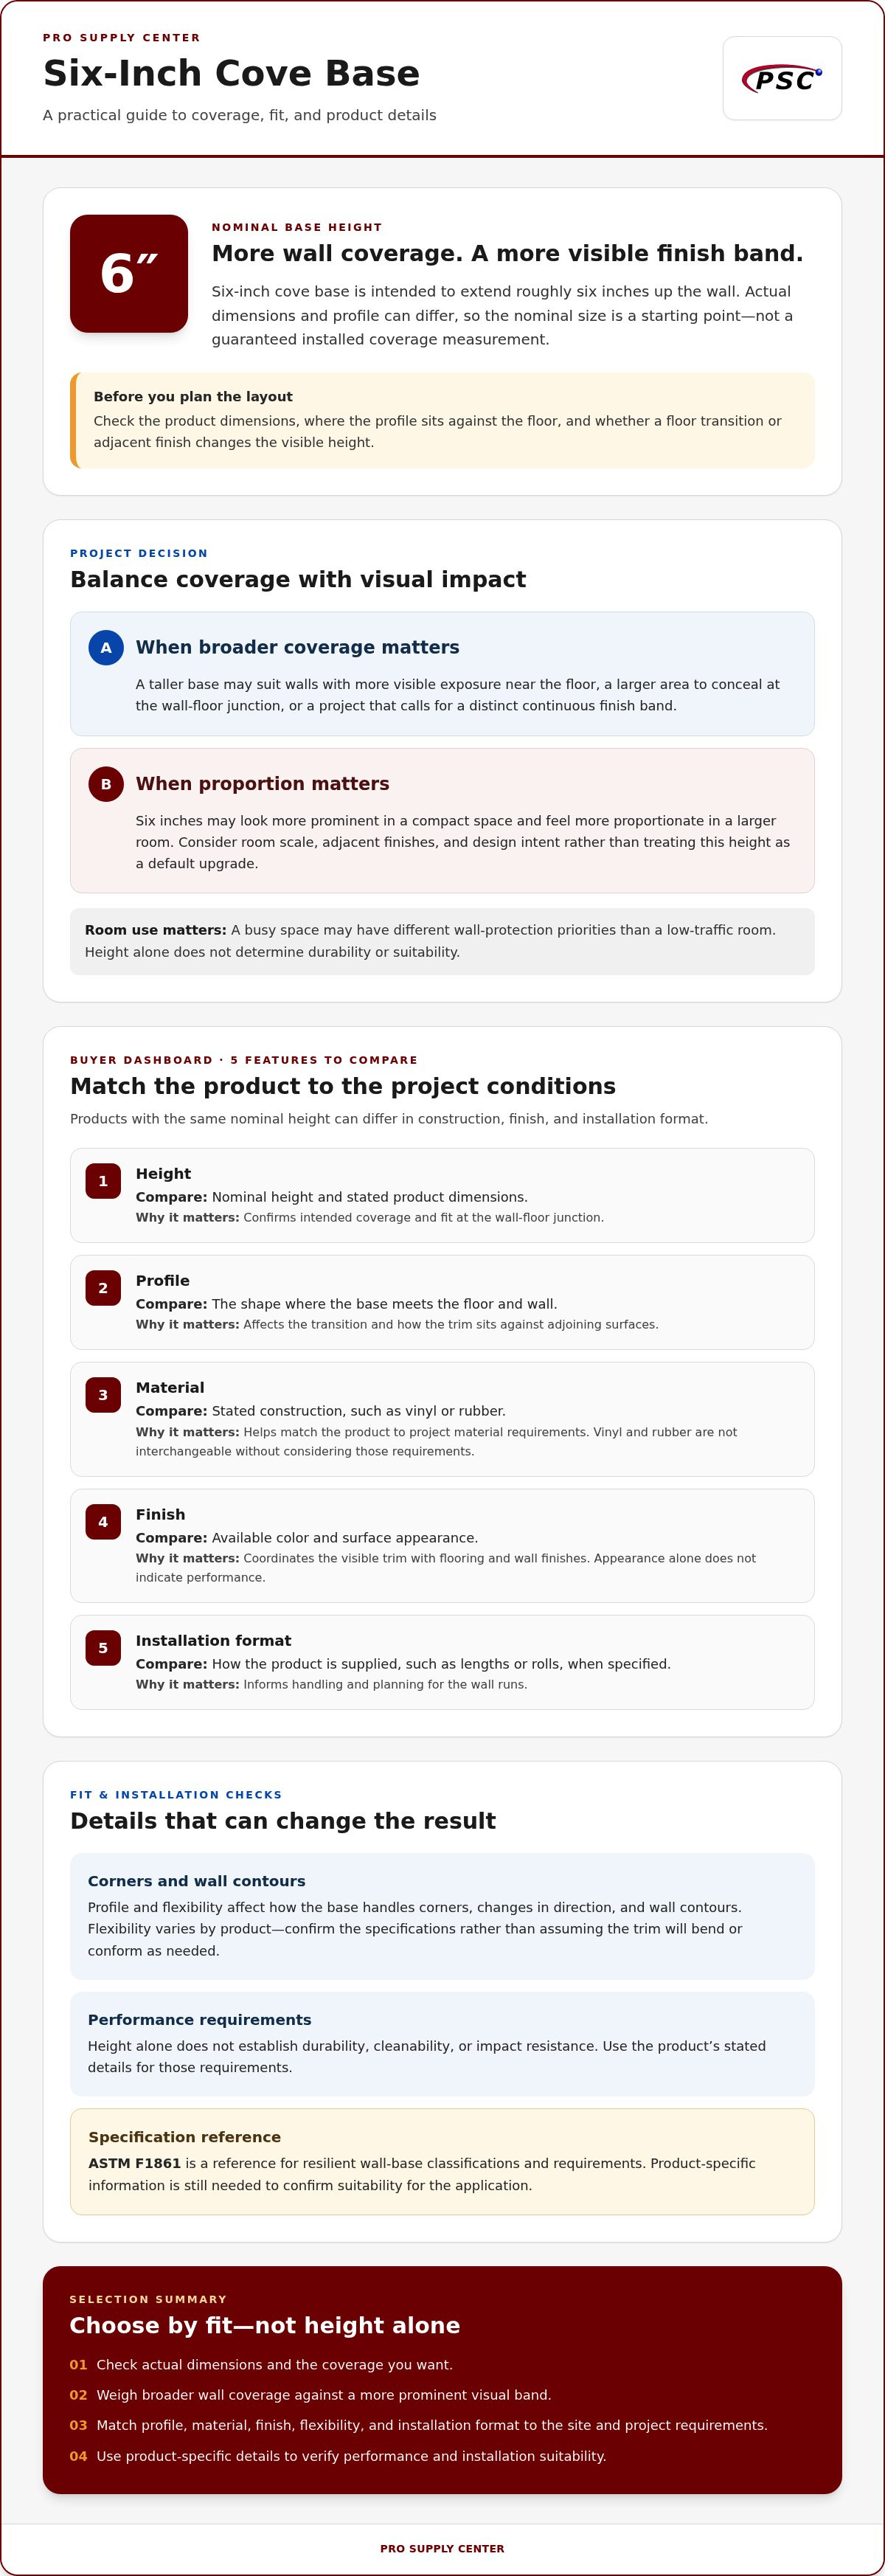
A six-inch base is intended to extend roughly six inches up the wall from the floor, subject to the product’s actual dimensions and profile. That broader band may suit walls with more visible exposure near the floor or projects that need to align with a particular finish detail. Consider floor transitions and room use as well. A busy space may have different wall-protection priorities than a low-traffic room, but height alone doesn’t determine durability or suitability.
Compare the product dimensions with the wall area you want to cover. Check where the profile sits against the floor and whether the floor transition or adjacent finish changes the visible height.
When might a taller wall base be practical?
A taller base can make sense when a project calls for more wall coverage or a distinct, continuous finish band. For example, a renovation may need to conceal a larger area at the wall-floor junction than a shorter trim would cover. The right choice still depends on the room’s scale, adjacent finishes, and design intent. In a compact space, six inches may appear more prominent; in a larger room, it may feel proportionate.
Use project specifications and site conditions to guide the decision instead of treating six inches as a default upgrade. Compare the intended coverage with the visual effect, then check that the profile works with the floor and wall details. The right height meets the project’s functional and finish requirements without adding unnecessary visual weight.
Which 6 Inch Vinyl Cove Base Features Should Buyers Compare?
Two products with the same nominal height can differ in profile, construction, finish, and installation format. Compare those details with the wall, floor, and project requirements rather than choosing by appearance alone. Choose cove base by matching its dimensions, profile, material, finish, and installation format to the project conditions.
The ASTM F1861 Standard Specification for Resilient Wall Base provides a reference for resilient wall-base classifications and requirements. Use product-specific information to understand a trim’s construction and configuration. A standard reference does not replace checking whether the product details suit your application.
| Feature | What to compare | Why it matters |
|---|---|---|
| Height | Nominal height and stated product dimensions | Confirms the intended coverage and fit at the wall-floor junction. |
| Profile | The shape where the base meets the floor and wall | Affects the transition and how the trim sits against adjoining surfaces. |
| Material | Stated construction, such as vinyl or rubber | Helps match the product to project material requirements. |
| Finish | Available color and surface appearance | Coordinates the visible trim with flooring and wall finishes. |
| Installation format | How the product is supplied, such as lengths or rolls, when specified | Informs handling and planning for the wall runs. |
How do profile and flexibility affect fit?
Profile determines the trim’s shape at the floor-to-wall transition. Compare it with the floor edge and wall condition, especially at corners and changes in direction. Flexibility can affect how the base handles corners and wall contours, but it varies by product. Don’t assume a trim will bend or conform as needed unless its specifications support that use.
What finish and material details matter?
Start with functional requirements, including coverage and how the base meets adjacent surfaces. Then compare the visible finish with the flooring, wall color, and overall design. Color and surface appearance help with coordination, but they don’t indicate performance.
Vinyl and rubber are both cove base material categories, but they aren’t interchangeable without considering the project’s requirements. Review each product’s stated material, finish, and construction details. For 6 inch vinyl cove base, confirm actual dimensions and profile before finalizing your selection. Pro Supply Center’s vinyl and rubber cove base trims provide options to compare as you plan.
Is 6 Inch Vinyl Cove Base Too Tall? Evaluate the Project Before Deciding
No. Six inches isn’t automatically too tall, and it isn’t right for every space. The question is whether the added wall coverage serves the project and looks proportionate alongside the room’s finishes. Weigh practical coverage against visual impact rather than treating height as a universal upgrade.
What are the practical advantages and trade-offs?
A taller base may suit a project that calls for broader coverage at the wall-floor junction. The trade-off is a more noticeable band around the room. That emphasis may suit the design or compete with other finishes. Height alone doesn’t establish durability, cleanability, or impact resistance, so rely on the product’s stated details for those requirements. For specification context, the WBDG reference to the ASTM F1861 Standard Specification identifies a standard relevant to resilient wall base, but it doesn’t determine which height will look right in a particular room.
| Project condition | Potential advantage of six inches | Possible trade-off |
|---|---|---|
| Broader wall coverage is a project requirement | More of the lower wall can be covered than with a shorter base. | Confirm actual dimensions and coverage against the requirement. |
| The room has a compact or visually restrained design | A taller base may still meet a specific finish need. | The base may stand out more and feel visually dominant. |
| Adjacent flooring or trim already creates strong lines | A coordinated base can contribute to a deliberate perimeter finish. | Contrasting color or competing trim can draw extra attention to its height. |
How should room appearance influence the choice?
Consider the whole perimeter, not just one short section of wall. Look at wall height, flooring, existing trim, and the room’s overall scale. A contrasting color can make the base read as a stronger horizontal band, while a closer match to adjacent finishes may make the transition less pronounced. Judge these visual effects in context.
Before placing a larger order, compare a product sample or make a small mock-up where available. View it beside the flooring and adjacent trim, and assess it from different parts of the room. This helps you decide whether the 6 inch vinyl cove base meets the coverage need without overpowering the finish scheme. Let the project specification guide the height, then use the visual check to catch coordination concerns early.
How to Measure and Plan a 6 Inch Vinyl Cove Base Order
Accurate ordering starts with a wall-by-wall plan, not a rough room estimate. Map each wall run, record its length, mark openings and interruptions, then note corners, ends, and transitions. This creates a clear takeoff and helps prevent missed sections or mismatched trim details.
How do you calculate the amount of cove base needed?
Use one unit of measurement throughout, such as inches or feet, and label each entry. Measure every wall run separately instead of relying only on overall room dimensions. Alcoves, offsets, and irregular layouts can change the total.
- Map the wall runs. Sketch the room and label each continuous stretch of wall.
- Measure each run. Record its length in the same unit and note its location on the sketch.
- Account for openings. Mark doorways and other interruptions, then determine from the project layout whether the base continues through or stops at each one.
- Plan corners and transitions. Count inside and outside corners, exposed ends, and points where the trim meets another finish.
- Verify the takeoff. Recheck the measurements against the sketch before converting the total into product quantities.
The final quantity depends on how the product is packaged and supplied. Compare your measured coverage with the stated length per piece, roll, or package, as applicable. Allow for cutting waste based on the room layout and planned seams, rather than adding the same amount to every project. A layout with many short runs or corners may need a different allowance than long, uninterrupted walls.
How should corners and transitions be planned?
Corner and transition details affect both the takeoff and the finished appearance. Mark each location on the sketch, then review the product’s stated method for forming corners or using compatible accessories. Don’t assume an accessory or corner method works with every base. Plan cuts and seams so they fall in deliberate locations and create a consistent finish along the wall.
Before ordering 6 inch vinyl cove base, compare the measured total with the product format and review your corner count. Keep the sketch and measurement notes together so you can refer to them during installation planning. Browse vinyl and rubber cove base as you prepare your project takeoff.
Select 6 Inch Vinyl Cove Base for Your Installation Conditions
Before choosing 6 inch vinyl cove base, match the trim to the actual installation conditions, not just the intended appearance. Wall and floor substrates, surface preparation, product dimensions, and corner details all affect whether the selection will work. Use this final review to catch mismatches before placing an order.
What substrate and preparation details should be considered?
Identify the wall and floor surfaces where the trim will be installed. Their condition and compatibility with the product influence which installation materials and preparation steps are appropriate. Follow the product instructions for surface preparation, including cleanliness and any other stated conditions. Select the adhesive and installation method according to those instructions and the substrate. Don’t assume one adhesive or method suits every cove base and surface combination.
What should buyers confirm before completing an order?
Compare your project notes with the product’s stated information:
- Height: Confirm the nominal height and check product dimensions against the intended coverage.
- Profile: Verify that the shape suits the wall-floor transition and adjacent finishes.
- Substrate: Identify the installation surfaces and review the product’s preparation and compatibility instructions.
- Finish: Compare the selected color and surface appearance with the flooring and nearby trim.
- Measurements: Recheck each wall run, account for openings, and match the total to the product’s stated package or roll coverage.
- Corners and transitions: Confirm how inside corners, outside corners, ends, and changes in finish will be handled.
Keep the layout and product details together as you finalize the order. The corner approach can affect how much trim you need and where cuts or seams fall, so confirm that the stated forming method or compatible accessories suit the installation layout. For broader context on material and product-category decisions, review the commercial cove base selection guide.
Cove base selection alone doesn’t establish that a product is waterproof or suitable for every surface or environment. Base your decision on the specific product instructions and project conditions. Once your checklist is complete, explore Pro Supply Center’s cove base options as you plan the next step.
Choose Cove Base With the Project in Mind
The right 6 inch vinyl cove base depends on more than its nominal height. Match coverage and profile to the wall-floor transition, consider how the finish fits the room, and verify substrate and installation requirements before ordering. A measured plan that accounts for wall runs, openings, corners, and product format helps reduce last-minute adjustments.
Use the checklist in this guide to compare product details and confirm your measurements before making a selection. Pro Supply Center carries vinyl and rubber cove base trims for different project needs.
Ready to review your options? Explore vinyl and rubber cove base options and choose a trim that fits your installation conditions.
Frequently Asked Questions
Is 6 inch vinyl cove base too tall for a room?
Not necessarily. Six inches can be appropriate when the project needs that coverage and the trim suits the room’s proportions. Consider wall height, flooring, adjacent trim, and whether the base will create a noticeable band around the perimeter. A sample or small mock-up beside the floor finish can help you judge the visual effect. Check the product’s actual dimensions, since nominal height may not equal installed coverage.
What is 6 inch vinyl cove base used for?
It covers the wall-floor junction with a resilient trim profile and provides a taller band of coverage than shorter base options. A project may call for that broader area to meet a finish requirement or cover more of the lower wall. Suitability depends on the room conditions and product details. Review the profile and dimensions alongside the floor transition and the wall area you intend to cover.
How do you measure for vinyl cove base?
Measure each wall run separately and record all lengths in one consistent unit. Sketch the room, mark doorways and other interruptions, then note inside corners, outside corners, ends, and transitions. Recheck the measurements before totaling the coverage. The final order quantity depends on the product’s supplied format and stated coverage per piece, roll, or package. Include a practical allowance for cuts and layout waste instead of using a fixed extra amount.
Can vinyl cove base be installed over concrete?
It may be suitable over concrete if the specific product instructions allow that substrate and the surface meets its preparation requirements. Check that the concrete is clean and suitable for the stated installation method. Don’t assume all vinyl base products or adhesives are compatible with every slab condition. Follow the product’s directions for preparation and installation materials, using the substrate and product specifications to guide the decision.
Does vinyl cove base need adhesive?
Many installation methods use adhesive, but the requirement depends on the specific cove base product and its instructions. Confirm the recommended adhesive, application method, and substrate compatibility before starting. Prepare the wall surface as directed, including making it clean and smooth where specified. Don’t choose an adhesive based only on the material name. Follow the product directions to match the installation materials to the trim and surface.
How do you handle inside and outside corners with vinyl cove base?
Plan corners before ordering by counting inside corners, outside corners, exposed ends, and transitions on a room sketch. Review the product’s stated corner-forming method and any compatible accessories. Don’t assume every trim can be shaped the same way or that accessories work across products. Account for cuts and seams in the layout, placing them thoughtfully to maintain a consistent finished appearance along the wall.
Is vinyl cove base waterproof?
Don’t assume vinyl cove base makes a wall or floor assembly waterproof. The material and installed joint are not, by themselves, proof that the surrounding surface is protected from water. Check the specific product information for its intended use and limitations, and follow the project’s moisture-control requirements. If the area needs waterproofing, treat that as a separate system requirement rather than relying on cove base trim to provide it.


