

What if the membrane is sound, but a missed corner or mismatched drain undermines the shower assembly? A capable product is only part of the answer. Preparation and careful detailing matter just as much, especially where components meet.
Professionals know that choosing a Bathroom waterproofing system for professionals means looking beyond product claims. The membrane, drain, corners, and penetration details need to work as a coordinated assembly, and the installation sequence needs to leave room for inspection before tile goes in.
This guide explains how to assess a system against practical jobsite criteria, plan the waterproofing sequence, and apply quality-control checks before setting tile. You’ll learn what to review in product documentation, how to account for substrate preparation and critical transitions, and where to verify requirements for the project. It also introduces PSC Pro Gen II as a product option and connects the system discussion to shower drains, niches, and other related components without assuming compatibility. The goal is a clearer selection process and a more disciplined plan before the work is covered.
Key Takeaways
- Assess a Bathroom waterproofing system for professionals by reviewing substrate needs, seam treatment, transitions, and installation sequence.
- Evaluate drains, corners, pipe seals, and other interfaces as parts of the assembly, not as standalone purchases.
- Compare system requirements with the shower’s substrate, layout, drain type, detailing, and crew experience.
- Plan preparation, installation, and pre-tile quality checks around the selected system’s current instructions.
- Explore PSC Pro Gen II, waterproofing shower kits, and related shower components as options for project planning.
What a Professional Bathroom Waterproofing System Must Accomplish
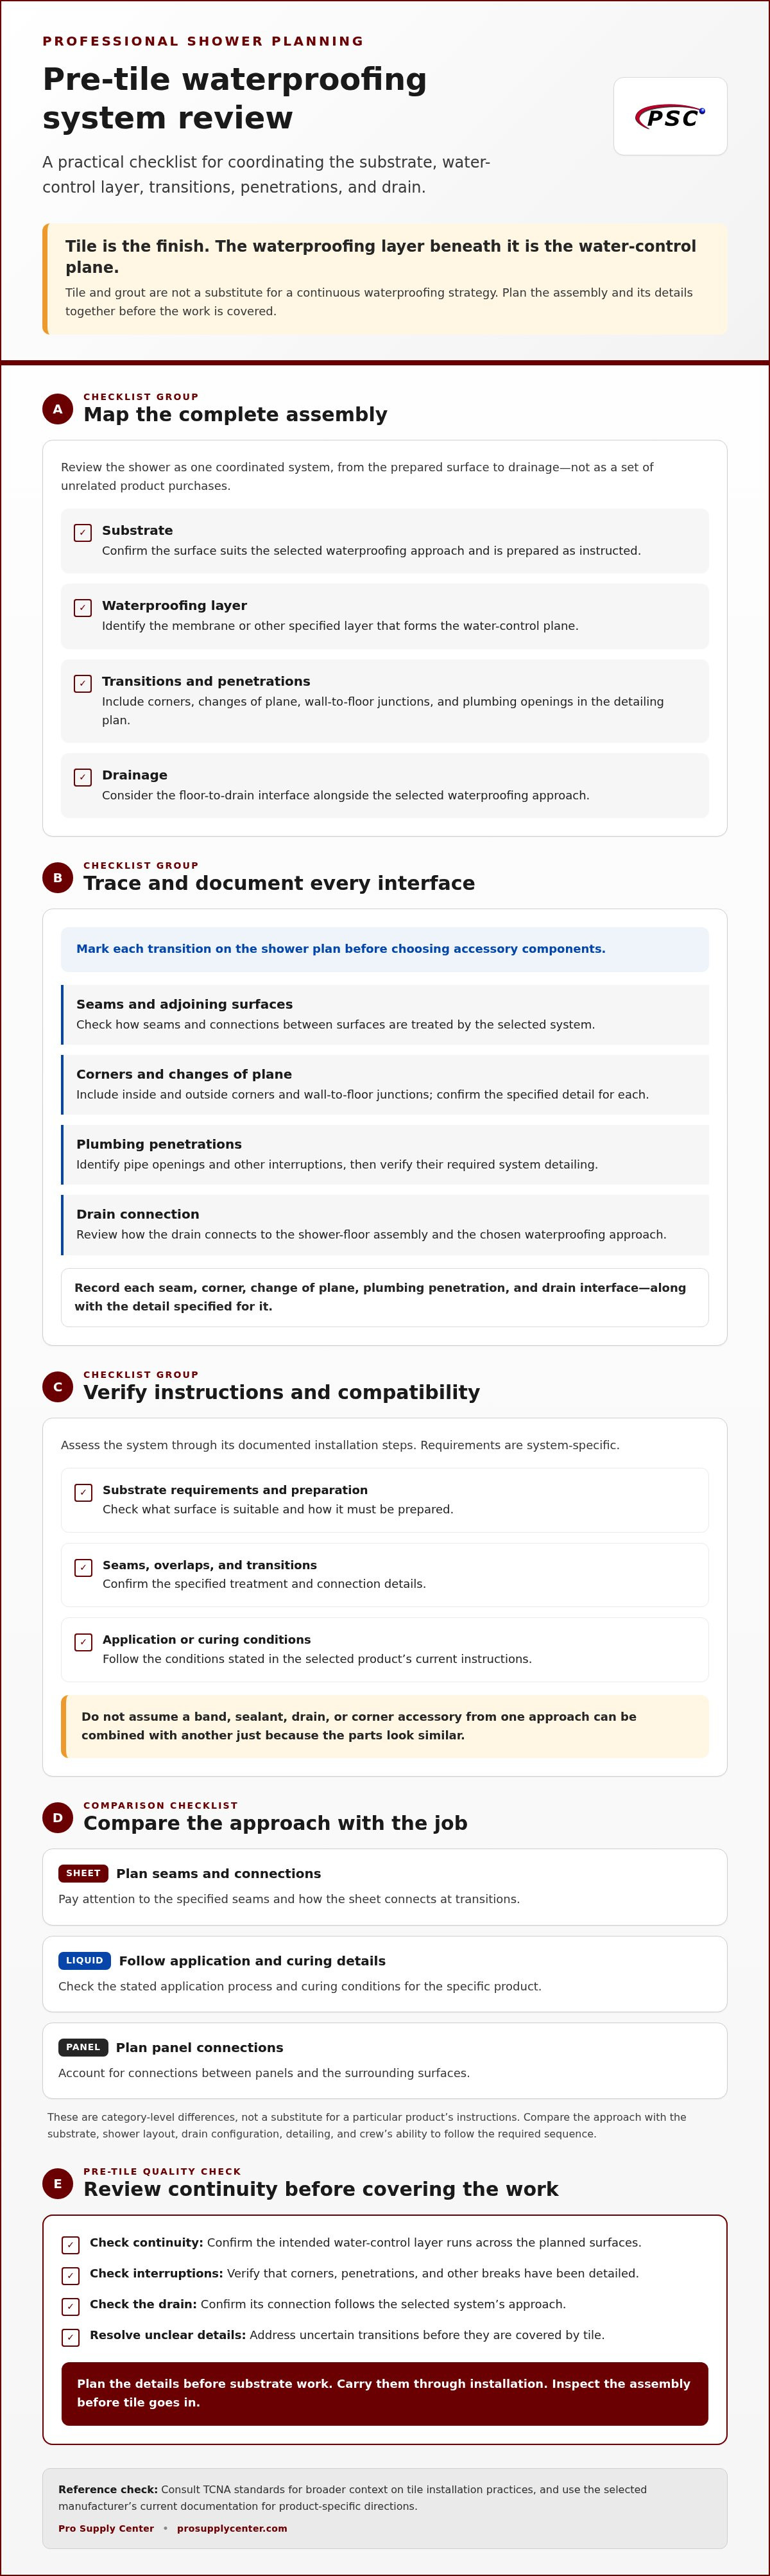
A Bathroom waterproofing system for professionals is a coordinated assembly that manages water behind tiled surfaces, from the prepared substrate to the drain. It includes more than a membrane: seams, corners, changes of plane, plumbing penetrations, and the connection to drainage all need to be addressed as part of one installation plan.
Tile is the finish; the waterproofing layer beneath it is the water-control plane. Tile and grout create the visible, usable surface, but they aren’t a substitute for a continuous waterproofing strategy. Water can pass through grout joints or other openings in the finish. The assembly behind it must be specified and installed to manage that exposure in line with the project conditions and the selected system’s instructions.
At a high level, plan around five connected elements:
- Substrate: The surface must suit the selected waterproofing approach and be prepared as instructed.
- Waterproofing layer: The membrane or other specified layer forms the water-control plane.
- Transitions: Corners and changes of plane need details that connect adjoining surfaces.
- Penetrations: Plumbing openings and other interruptions require appropriate system detailing.
- Drainage: The floor and drain interface must fit the project’s waterproofing approach.
These elements are related, but their details aren’t interchangeable across every shower. The floor layout, wall construction, drain configuration, and chosen products affect how the assembly is put together. Treating each item as a separate purchase can leave gaps in the plan, especially where materials meet or the waterproofing layer terminates.
Which parts of the shower assembly need coordinated protection?
Include shower walls and floor, inside and outside corners, wall-to-floor junctions, and plumbing penetrations in the review. The drain interface deserves particular attention: it connects the shower floor to the selected waterproofing approach, so its detail must be considered alongside the floor assembly rather than after it. Project conditions and current product instructions determine the specific treatment at each location.
Why system continuity matters behind tile
A seam, corner, or penetration that interrupts the water-control plane can create a path for moisture beyond the tiled surface. Professionals can reduce planning gaps by identifying transitions before substrate work begins, then carrying those details through the installation and pre-tile review. The objective isn’t to assume a leak-proof result; it’s to specify and install a coherent assembly according to its instructions and the conditions on site.
This system-level view also gives the crew a practical way to check readiness before tile installation. Confirm that the intended water-control layer is continuous across the planned surfaces, that interruptions have been detailed, and that the drain connection follows the selected approach. Resolve unclear transitions before they’re covered. Once tile is installed, those details are harder to inspect and correct.
How to Assess Waterproofing Membranes, Components, and Compatibility
A Bathroom waterproofing system for professionals should be assessed as a set of documented installation steps, not a collection of products that seem suitable individually. Start with the substrate, then trace how the waterproofing layer connects at seams, corners, changes of plane, penetrations, and the drain. A good comparison makes those interfaces visible before materials are selected or work begins.
Review current product instructions for the exact substrate requirements, surface preparation, seam treatment, overlaps, and application or curing conditions. These details are system-specific. Don’t assume that a band, sealant, drain, or corner accessory from one approach can be combined with another simply because the parts look similar. For broader context on tile installation practices, consult the Tile Council of North America (TCNA) standards for waterproofing, then use the selected manufacturer’s current documentation for product-specific directions.
What to verify at seams, corners, drains, and penetrations
Mark every transition on the shower plan before choosing accessory components. Note inside and outside corners, wall-to-floor junctions, pipe openings, and the drain connection. Then confirm how the selected system treats each detail and what preparation or sequence it requires. Documenting these interfaces helps the crew work from one consistent plan instead of making decisions as details arise.
Document every seam, corner, change of plane, plumbing penetration, and drain interface, along with the detail specified for each one.
How to compare sheet, liquid, and panel-based approaches
These categories differ in how they’re applied and how their seams or transitions are detailed, but no type is automatically the right choice for every shower. Sheet products require attention to their specified seams and connections; liquid-applied products depend on the stated application and curing process; panel-based approaches require planned connections between panels and surrounding surfaces. These are category-level distinctions, not a substitute for the instructions of a particular product.
Compare the approaches against the substrate and the crew’s ability to follow the required sequence. Check whether the instructions address the actual surfaces and transitions in the project, and identify any details that require a specific accessory or preparation step. Keep manufacturer requirements separate from general descriptions of a product category. If a standard or performance claim matters to selection, verify it in current technical documentation rather than inferring it from a product’s name or format.
- Substrate: Confirm the listed surfaces and required preparation.
- Seams and transitions: Identify the specified treatment at each joint and change of plane.
- Penetrations and drainage: Match details to the actual plumbing layout and drain interface.
- Sequence and curing: Record application order and stated conditions before scheduling tile work.
For product-specific details, the PSC Pro Gen II system reference guide offers a focused starting point. You can also explore Pro Supply Center’s waterproofing options as you plan the assembly.
How Professionals Can Compare Systems Against Real Project Conditions
A system that suited a previous job may not suit the next one. A compact shower with straightforward walls presents different coordination demands from a custom layout with multiple corners, niches, plumbing openings, or an unusual drain arrangement. Compare the assembly against the actual project, not just the membrane material or a familiar product name. A Bathroom waterproofing system for professionals is a practical fit only when its documented requirements align with the jobsite conditions and installation plan.
Which project conditions should shape the comparison?
Start with the plans and record the conditions that affect installation. Use this comparison framework to identify where each candidate system needs a closer review:
Substrate: Identify the planned wall and floor surfaces, then compare them with each system’s stated substrate limits and preparation instructions.
Geometry: Note the shower layout and count the corners, changes of plane, niches, and other details that shape the required sequence.
Drain type: Record the specified drain configuration and determine how the system documentation addresses its connection to the waterproofing approach.
Detailing: List the transitions and penetrations, then identify the documented treatment for each one.
Documentation: Review current installation instructions and technical documents for applicable limits, preparation, and required conditions.
Crew familiarity: Consider whether the crew knows the installation method and can follow its steps consistently. Familiarity is useful, but it doesn’t replace checking the instructions for this project.
Project complexity changes the weight of these criteria. A simple layout may have fewer transitions to plan, while a shower with numerous penetrations or intersecting surfaces requires careful coordination and a clear sequence before work starts. Separate confirmed product requirements from assumptions based on past jobs. A membrane that has been used before doesn’t, by itself, establish that the drain, accessories, substrate, and installation conditions suit this assembly.
How to assess system claims without relying on marketing language
Trace claims to current manufacturer literature, test documentation, or applicable standards. Check that comparisons address equivalent components and installation conditions, not an isolated feature presented without context. For liquid-applied membranes, for example, the ASTM C836 standard for liquid-applied waterproofing membranes has a defined scope; it shouldn’t be treated as a blanket qualification for other product types or a substitute for the installation instructions.
A meaningful system comparison matches each product’s documented requirements to the same project conditions, interfaces, and installation sequence. This keeps the decision grounded in jobsite fit rather than broad claims. For projects using a kit format, the waterproofing shower kit professional guide adds focused context for evaluating that option. Pro Supply Center’s waterproofing products can also be considered alongside the project’s documented component needs.
Before selection, write down any unresolved mismatch, such as a substrate condition or drain detail not addressed in the documents at hand. Resolve it through current product documentation before the crew commits to a sequence. This makes the comparison useful for planning, not just purchasing, and gives the team a shared reference for the next jobsite review.
A Professional Jobsite Workflow for Preparation and Quality Control
A Bathroom waterproofing system for professionals needs a workflow that makes installation requirements clear before work is concealed. Use the selected system’s current instructions as the controlling reference for substrate preparation, application sequence, detailing, and curing. Keep the relevant documents and inspection notes with the project record so the crew can verify each stage against the same requirements.
What to check before waterproofing begins
Review the approved installation documents alongside the shower layout. Inspect substrate condition and readiness, then compare drain placement, corners, changes of plane, and plumbing penetrations with the planned details. Resolve conflicts before applying the waterproofing layer. Record preparation steps, relevant site conditions, and project-specific requirements so later checks have a clear reference.
- Review the plan and instructions. Confirm the selected system, current manufacturer documents, and intended installation sequence are available to the crew.
- Inspect the substrate. Compare the surface and its preparation with the system’s stated requirements. Address deficiencies before application.
- Check layout and interfaces. Confirm the drain location and identify corners, penetrations, and other transitions that need detailing.
- Document readiness. Keep notes or photographs of preparation and any project-specific conditions relevant to the installation record.
- Apply and allow to cure. Follow the system instructions for application and curing conditions. Don’t substitute a familiar routine for the stated requirements.
- Complete the pre-tile review. Compare installed details with the instructions, record findings, and resolve issues before tile work proceeds.
What to inspect before tile installation
Review the completed waterproofing layer while it remains visible. Check seams, corners, penetrations, and drain transitions against the selected system’s details. Verify specified coverage, continuity, and curing conditions from current manufacturer documentation rather than relying on appearance alone. Record the inspection, including locations reviewed and any corrective work, then reassess repaired areas before they’re covered.
The pre-tile inspection is the last visible quality-control opportunity to review the waterproofing details before tile conceals them. Treat it as a documented hold point, not a quick walk-through. If a detail doesn’t match the instructions or can’t be clearly assessed, pause and resolve it before moving on.
Good records make the workflow easier to follow across the crew. For a closer look at how drains, niches, and waterproofing relate in shower planning, the professional shower installation components guide provides relevant component context.
As you plan the assembly, explore Pro Supply Center’s waterproofing products and shower drains alongside the project’s documented requirements.
Choosing a Professional Waterproofing System from Pro Supply Center
After comparing project conditions, installation requirements, and documentation, professionals can narrow the field to a product option that fits the job. Pro Supply Center’s priority offering is the PSC Pro Gen II Waterproofing System. Consider it as part of the same evaluation process used for any system: review current product instructions and compare them with the project’s substrate, layout, detailing, and installation plan.
When to consider PSC Pro Gen II for a professional project
PSC Pro Gen II is a dedicated shower waterproofing product option for professionals planning a tiled shower assembly. Its suitability depends on how the current product instructions align with the project requirements, not on the product name alone. The PSC Pro Gen II system reference guide provides focused product information to support that review.
Keep the project scope in view as you assess the system. For example, a plan with a different substrate or a more detailed shower layout may call for closer attention to the instructions and installation sequence. Don’t infer specifications, component compatibility, or performance from a general description. Use current product documentation to guide those decisions, and record any requirements that affect preparation, detailing, or inspection.
How to move from system selection to a planned installation
Once a product has been selected for further evaluation, turn its documentation into a job-specific plan. Identify the materials and components the project calls for, then organize the work sequence and concealed-work checks around the instructions. Waterproofing shower kits may be useful to consider when planning a coordinated set of supplies. The shower-kit guide offers additional context for that format.
Related components should be included only where they fit the project plan. Pro Supply Center also offers shower drains, ceramic niches, and ceramic soap dishes. Their presence in a product range doesn’t establish compatibility with a particular waterproofing approach, so use current documentation to assess each component in context. Keep the assembly decisions tied to project requirements rather than assuming that separately selected items will work together.
- Confirm the basis for selection: Match the project conditions to current product instructions.
- Plan the sequence: Note preparation, application, detailing, and curing requirements for the crew.
- Set inspection points: Record what must be reviewed and documented before tile covers the work.
This turns product selection into a practical installation plan without confusing material supply with installation work. For a Bathroom waterproofing system for professionals, a clear record of the chosen product, its instructions, the planned components, and the quality checks helps keep the team aligned from preparation through pre-tile review.
Explore the PSC Pro Gen II Waterproofing System and review its current product information as you plan your shower project.
Put Your Waterproofing Plan Into Practice
Before the next shower project moves into material ordering, turn the selection decision into a job-specific plan. Set aside the current product instructions, map the assembly details, and define who will document the work before it’s covered. That preparation gives the crew a shared reference and makes the next steps easier to coordinate.
A Bathroom waterproofing system for professionals should be selected with the actual project in mind, not treated as a one-size-fits-all specification. Use that standard as you review product options and plan the work. Pro Supply Center’s waterproofing range includes its PSC Pro Gen II Waterproofing System, shower kits, drains, and related shower components, giving professionals options to consider as they organize project materials.
Take the next step by reviewing the system information and matching it to your project documentation. Explore the PSC Pro Gen II Waterproofing System as you prepare your shower plan. A clear selection and a disciplined jobsite process are practical foundations for moving confidently toward tile installation.
Frequently Asked Questions
What is a bathroom waterproofing system for professionals?
A bathroom waterproofing system for professionals is a coordinated approach to managing water behind tiled surfaces. In practice, a project submittal or job plan should identify the selected waterproofing product, the relevant connection details, and how the drain interface will be handled. The exact assembly depends on the products and shower conditions. Tile and grout are the finish, so they shouldn’t be treated as the only water-control measure.
Is tile itself waterproof enough for a shower?
No. Tile and grout provide the finished surface, but they aren’t a substitute for an appropriate waterproofing layer behind it. Water may pass through joints or reach vulnerable areas around openings and surface transitions. For example, an intact-looking tiled wall doesn’t show whether the underlying assembly was prepared and detailed as specified. Plan the waterproofing approach before tile work, and use the selected product instructions for installation requirements.
Can different waterproofing brands or components be mixed in one shower system?
Don’t assume that products from different systems are compatible just because they appear to perform similar functions. A combination may create a connection that isn’t addressed by any one set of instructions. Before specifying mixed components, review current documentation for the materials and their interfaces. If the planned combination lacks a clearly documented detail, treat that as an unresolved design issue rather than relying on appearance or experience alone.
How do professionals choose between sheet, liquid, and panel waterproofing systems?
Compare each method against the project’s substrate, shower geometry, drain arrangement, detail requirements, and installation sequence. Also consider whether the crew is familiar with the method and can follow its written instructions. A previous successful installation doesn’t establish suitability for a different layout or substrate. Compare complete assemblies under equivalent project conditions, and use current technical documents for product-specific requirements rather than relying on category labels.
What should be inspected before tile is installed over a waterproofing system?
Check the installed work against the selected system’s current instructions, including the details at seams, corners, penetrations, and the drain. Confirm required application and curing conditions from the product documentation, and record concealed work with notes or photographs before tile covers it. For instance, document any repair and recheck that area before proceeding. The system instructions and project requirements should set the inspection criteria.
Does a professional waterproofing shower kit include every item needed for every project?
Not necessarily. Compare the kit contents with the planned shower layout, drain arrangement, transitions, and installation instructions before work begins. A niche or additional plumbing detail, for example, may affect which components the project calls for. Pro Supply Center offers waterproofing shower kits, and its focused shower-kit guide can help with planning. Use the selected kit’s current documentation to identify requirements for the specific installation.


