

A shower pan can look sound and still hide a leak that damages the room below. Knowing how to flood test a shower pan before tile installation gives you a chance to catch problems while the waterproofing and drain assembly are still accessible.
Where should the drain be plugged? How high should the water reach? How long should it stay in the pan? A reliable test is more than setting a timer. It’s a controlled check of the completed pan assembly, with the plug position, water level, and test duration guided by the installation instructions and applicable local code.
This guide explains when to test, how to prepare and plug the drain, and how to fill and monitor the pan. You’ll also learn what a stable water level can tell you, which signs may point to a leak, and how to approach an uncertain result. Testing before tile goes in lets you investigate concerns before the finished shower conceals the assembly.
Key Takeaways
- Learn how to flood test a shower pan using a controlled sequence that starts only after the waterproofing has cured as directed.
- Choose the test plug location and setup based on the drain design and the parts of the assembly you need to evaluate.
- Use the specified test duration and water level to assess the result. Investigate a drop instead of assuming it identifies a specific defect.
- Plan the waterproofing system, pan, drain, and related components as an assembly before tile installation.
- Document the test and resolve uncertain results before moving on to tile.
What a shower pan flood test checks, and when to do it
A shower pan flood test is a controlled water-hold check of the completed waterproofing assembly. Water is held in the receptor while the pan, drain connection, and waterproofed transitions are monitored for leakage. The test shows whether the installed assembly contains water under the test conditions. It does not certify that the shower can never leak or that every part of the bathroom has been tested.
What does a shower pan flood test verify?
The test focuses on the pan and its waterproofing, including the connection at the drain. That’s different from spraying the walls or briefly running water to see whether it drains. A spray test checks a different set of surfaces, while a drain-flow check mainly shows whether water can move through the drain. A flood test holds water against the pan assembly so leakage may become visible.
Before tile, the membrane and connections remain accessible for inspection. If water appears below or outside the receptor, the exposed assembly is easier to examine and repair than a finished surface. For general background on the components of a shower, including the pan, see the overview of shower construction.
When should you flood test before tiling?
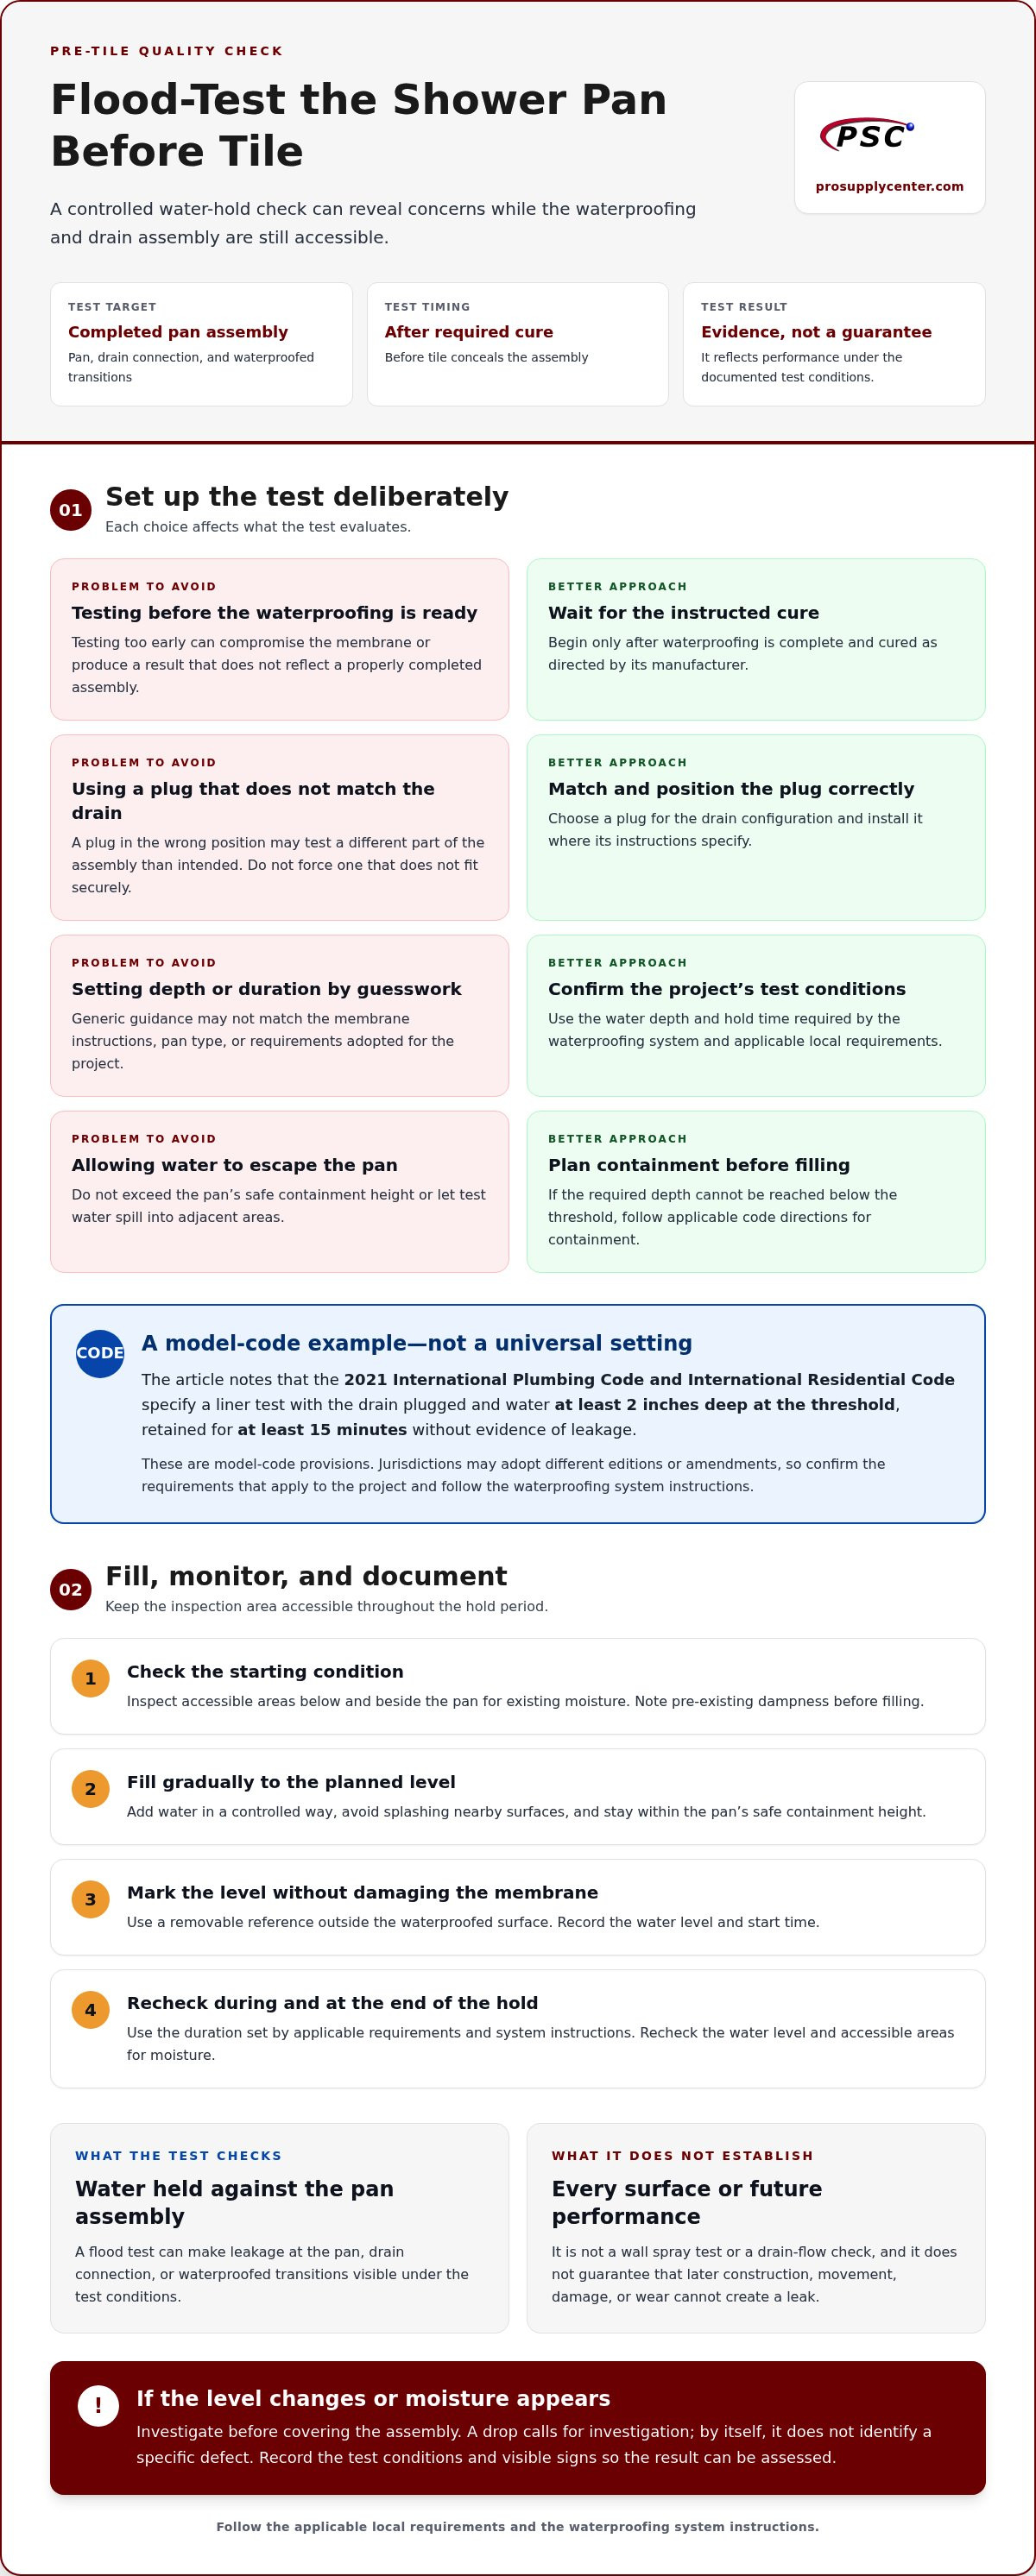
Test after the waterproofing has been installed and cured as directed by its manufacturer, and before tile conceals the pan. Follow the system instructions for preparation and testing, since curing time and other details can vary by product. Testing too early can compromise the membrane or produce a result that doesn’t reflect a properly completed assembly.
Local requirements matter, too. The 2021 International Plumbing Code and International Residential Code specify a liner test with the drain plugged and water at least 2 inches deep at the threshold, retained for at least 15 minutes without evidence of leakage. These are model-code provisions, not a universal rule for every project. Jurisdictions may adopt different code editions or amendments, so use the locally applicable requirements and waterproofing system instructions to set the test conditions.
Industry practice and enforceable requirements aren’t always identical. Flood testing is widely treated as a prudent pre-tile quality check, but whether a particular test is legally required depends on the code adopted for the project and its scope. Don’t assume a duration recommended in a forum or general guide applies to every membrane, pan type, or jurisdiction. Use the applicable instructions and code requirements to determine the test depth and hold time.
A passed test records performance under its specific, documented conditions. It doesn’t guarantee that later construction, movement, damage, or wear can’t create a leak. Record the water level, start and finish times, and any visible signs of moisture. If the level changes or leakage appears, investigate before covering the assembly. That distinction is central to understanding how to flood test a shower pan: the result is useful evidence, not a permanent guarantee.
How to flood test a shower pan: a controlled step-by-step method
Use a repeatable sequence, but treat the test depth, plug location, and hold time as specific to the project. The waterproofing system instructions and locally applicable requirements take priority over a generic procedure. The steps below help you prepare, monitor, and document the test without assuming one setup suits every pan.
Prepare the pan, drain, and inspection area
Begin only when the waterproofing is complete and has cured as its instructions require. Check that the drain assembly and pan are ready for testing, and review the plug instructions before installing it. For broader context on shower waterproofing standards and flood testing, consider how the test fits into the overall installation sequence.
- Confirm the test conditions. Identify the water depth and hold time specified by the system instructions and applicable local requirements. If these differ from general guidance, follow the requirements that apply to the project.
- Choose and position the plug. Match the plug to the drain configuration, then install it where its instructions specify. A plug in the wrong position may test a different part of the assembly than intended. Don’t force a plug that doesn’t fit securely.
- Check containment and access. Plan a water level that meets the required test conditions while staying within the pan’s safe containment height. If the required depth cannot be reached below the threshold, follow applicable code directions for containment rather than allowing water to spill into adjacent areas.
- Inspect and record the dry starting condition. Check accessible areas below and beside the pan for existing moisture. Note any pre-existing dampness, then record the planned water level and test conditions so changes are easier to assess.
Fill, monitor, and finish the test
Keep the inspection area accessible throughout the hold period. A baseline record helps distinguish new signs of moisture from existing conditions.
- Fill gradually. Add water in a controlled way to the planned level. Avoid splashing nearby surfaces, and don’t exceed the pan’s safe containment height.
- Mark and document the level. Use a removable reference outside the waterproofed surface so you can compare the water level later without puncturing or damaging the membrane. Record the start time and check accessible inspection points for moisture.
- Monitor for the required duration. Use the hold time set by the applicable local requirements and system instructions. Recheck the level and accessible areas during the test and at the end. Don’t substitute a familiar duration from another project.
- Drain and inspect. Once the test is complete, remove the water carefully. Before proceeding, inspect the exposed pan, drain connection, and accessible surrounding areas.
Plan the pan, drain, and waterproofing materials as one assembly. Shower drains and waterproofing materials are components to consider together before installation. A clear record of the test conditions makes the result easier to interpret.
Choosing a flood-test setup for different shower pans and drains
A test plug is useful only if it seals at the intended point. Drain style, pipe geometry, waterproofing method, and test objective all affect the setup. A plug that holds water in one configuration may not isolate the same assembly in another, so don’t treat one plug position or closure method as universal.
Match the test plug to the drain assembly
Start with the drain and waterproofing system instructions. The drain’s shape and internal surfaces determine where a plug can seat securely. The required position depends on which part of the assembly the test is meant to evaluate. A plug near the drain opening may isolate a different area than one placed farther into the pipe. Confirm the intended test boundary before filling.
Use a test plug designed for the relevant drain or pipe location, and install it as directed. Tape or another improvised closure can shift, leak, or block the wrong point. It may appear to seal the drain without reliably testing the intended connection. For broader assembly context, see the PSC Pro Gen II Waterproofing System guide.
| Pan and drain configuration | Setup considerations |
|---|---|
| Traditional curbed pan with a point drain | Check the drain instructions to identify the plug’s sealing position and the test boundary. |
| Surface-applied waterproofing with a bonding-flange drain | Follow the system and drain instructions together. Don’t assume the plug should sit at the same point as in a different drain assembly. |
| Pan with a linear drain | Account for the drain channel and outlet arrangement when selecting and placing the plug. |
| Curbless or open-entry shower | Plan containment carefully so test water stays within the intended assembly and does not escape into the bathroom. |
Account for pan design and water containment
A curbed shower typically has a raised threshold that helps contain test water. A curbless layout may not provide the same barrier, so the test plan must account for the open entry. Any temporary containment method needs to suit the waterproofed assembly and applicable requirements. Don’t add a barrier in a way that damages the membrane or creates an untested path for water to escape.
For either layout, hold water within the test area without exceeding the assembly’s intended boundaries. Check the required test level against the pan design, system instructions, drain details, and local requirements before starting. If the specified level cannot be contained safely, pause and resolve the setup rather than filling past the threshold.
These distinctions matter to how to flood test a shower pan: the right setup tests the intended components, not simply whether a temporary plug can hold water. Plan the waterproofing, pan, and shower drain as related parts, then follow the instructions for their specific configuration.
How to interpret a shower pan flood test and diagnose water loss
Interpret the result against the conditions you recorded, not by impression alone. A test passes when the water level remains stable for the specified duration and there’s no visible leakage at accessible inspection points. That supports the assembly’s performance under those test conditions. It doesn’t prove every concealed area is defect-free or rule out future damage.
What a stable or falling water level can tell you
A stable level combined with dry accessible areas is a positive result for the test performed. If the level drops, treat that as a reason to investigate, not proof that the membrane has failed. Water loss can result from a leak in the assembly, a plug that isn’t sealing correctly, or measurement variation. Environmental factors such as evaporation may also affect an exposed water surface, particularly over a longer hold.
Compare the starting and ending levels at the same marked location. Check that the plug hasn’t shifted and that water hasn’t escaped over the threshold or through temporary containment. A small difference that’s difficult to read isn’t enough to identify a failure point. Look for supporting evidence, such as dampness around the drain, below the pan, or at accessible edges.
What to do when the test does not pass
Keep tile off until you understand the result. First, review your notes: the marked level, test duration, plug position, and any moisture observed. Confirm that the plug was installed according to its instructions and that the test water stayed within the intended area. These checks can help distinguish a setup or measurement issue from a possible assembly leak.
- Stop and inspect. Check accessible areas around and below the pan, the drain connection, and visible waterproofing transitions for moisture or other signs of leakage.
- Drain the pan safely. Remove the water without disturbing the membrane or suspected area. Note where moisture appears and whether the observed level change matches the visible evidence.
- Identify the likely cause. Consider the plug seal, drain connection, membrane details, and containment before deciding what needs correction. A falling level alone cannot pinpoint the source.
- Repair according to the system instructions. Use the specified repair method for the waterproofing assembly. Avoid covering a suspected defect or applying an unapproved patch that could affect the system.
- Repeat the test. After the correction has reached the required condition, retest using the appropriate setup and the duration required by the system instructions and applicable local requirements.
Document the retest as carefully as the first one. Include the conditions, observations, and outcome so the decision to proceed with tile is based on a clear record. A successful test is evidence of performance during that test, not a permanent guarantee against leaks. Plan the waterproofing system and drain as related components. Explore shower waterproofing materials and drains as you plan the assembly before tile.
Plan waterproofing materials and next steps after the flood test
A reliable pre-tile workflow starts before the membrane goes down. Choose a waterproofing approach for the shower layout, coordinate it with the drain, follow the applicable product instructions, and plan how the completed assembly will be tested. Once the test meets its specified conditions, document the result and proceed with the next installation stage. If it doesn’t, resolve the issue before tile conceals the work.
Treat the pan, waterproofing, drain, and transitions as connected parts, not independent purchases. Their interfaces determine how water is contained and how the assembly is tested. For example, drain design affects the test-plug location, while the waterproofing method determines which installation and repair instructions apply. Coordinating these details helps you avoid planning around components that don’t match the intended assembly.
- Select the system: Base the choice on the shower layout and the system’s documented requirements.
- Coordinate the components: Plan the pan, drain, and related waterproofing materials together.
- Follow instructions: Use the product documentation for installation, curing, test setup, and repairs.
- Verify before tile: Complete the required test, record the conditions and result, and address concerns before covering the assembly.
Coordinate waterproofing and shower components
Before installation, check how the waterproofing material meets the drain and other transitions. Details vary by system and drain configuration, so don’t rely on assumptions from a different shower build. The professional shower hardware guide offers context on how drains, niches, and waterproofing fit into shower planning. For system-specific test details, follow the applicable product documentation.
Choose a product path for the next project stage
Pro Supply Center offers the PSC Pro Gen II Waterproofing System and waterproofing shower kits for planning a shower assembly. Compare product information with the project layout and required components, then follow the selected manufacturer’s instructions. The waterproofing shower kits guide can help you compare kit contents as part of that planning. Product selection alone doesn’t establish that a particular combination is compatible or guarantee a test result.
Keep the test record with the project documentation. Note the setup, applicable test conditions, observations, and outcome to create a clear reference before tile work begins. Understanding how to flood test a shower pan is one part of a well-planned assembly. Choosing materials with the drain and layout in mind supports an organized installation sequence.
For your next shower project, explore shower waterproofing supplies from Pro Supply Center.
Set up your next shower project with confidence
Before materials arrive, map the shower layout and decide how the pan, drain, and waterproofing approach will work together. Keep the product instructions with your project notes so the installation and test conditions are easy to reference as work progresses. A considered setup makes it easier to move from planning to tile with fewer unanswered questions.
Understanding how to flood test a shower pan is one part of building a dependable process. Choose materials that fit your project plan, then follow their instructions rather than relying on assumptions from another installation. Pro Supply Center offers the PSC Pro Gen II Waterproofing System, waterproofing shower kits, and shower drains for shower assembly planning.
Explore shower waterproofing supplies at Pro Supply Center and take the next step toward a well-planned installation. With the right preparation, you can move forward with a clear plan and greater confidence.
Frequently Asked Questions
Is a shower pan flood test required by every building code in the United States?
No. Building codes are adopted and amended by local jurisdictions, so a test requirement in a model code doesn’t automatically apply everywhere. The 2021 International Plumbing Code and International Residential Code include shower liner test provisions, but the locally adopted code and project requirements determine what applies. Check with the building department or inspector responsible for the project before testing, especially if an inspection is scheduled.
Can you flood test a curbless shower pan without a raised threshold?
Yes, but the water still needs to be contained safely at the required test level. The 2021 International Plumbing Code and International Residential Code call for a temporary threshold if the shower threshold is less than 2 inches high for the specified liner test. That provision may not apply identically in every jurisdiction, so use the locally adopted code and system instructions to plan temporary containment without damaging the waterproofing.
Can you flood test a shower pan after the tile has already been installed?
Possibly, if the installed system and applicable requirements allow it, but it’s less useful for locating a defect. Tile and grout can hide the membrane and drain connection, making water loss harder to trace and repairs more likely to require removing finished work. A post-tile test also may not verify the same exposed details as a pre-tile test. Follow the system’s instructions and don’t treat grout as the waterproofing layer.
How can you account for evaporation when monitoring a shower pan flood test?
Set a shallow control container of water near the shower, exposed to similar room conditions, and mark both water levels at the start. At the end, compare the control’s level change with the shower pan’s. A similar drop may indicate that evaporation contributed to the change, but this comparison is only a diagnostic aid. It doesn’t replace the test conditions required by the code or waterproofing system.
Can a shower pan flood test identify a leak in the water supply plumbing?
No. A flood test evaluates the water-holding performance of the shower receptor and the portion of the drain assembly included in the test. It doesn’t pressurize or assess supply lines that feed the shower valve or showerhead. If you suspect a supply-side leak, that plumbing needs a separate, suitable diagnostic check. For example, a leak that occurs when the shower isn’t being used may need investigation beyond the pan test.
Can a prefabricated shower base be flood tested like a tiled shower pan?
Not necessarily. A prefabricated base may have specific instructions for testing, drain connection, and water limits, so don’t assume a method intended for a site-built waterproofed pan applies. Follow the base manufacturer’s directions and local requirements before filling it. Keep water within the base’s intended containment area, and don’t use a test setup that could stress or damage the base or its connections.
Does passing a shower pan flood test guarantee the shower will never leak?
No. A passing result shows that the tested assembly held water under the recorded conditions and for the required period. It can’t predict later damage, movement, deterioration, or defects in parts that weren’t included in the test. Keep the test record with the project documentation, and remember that routine care and sound installation practices still matter after tile is installed. A test is useful evidence, not a lifetime guarantee.


